The safest way to open a bird seed bag is to find the designed opening point first: a tear notch, pull-tab, zipper, drawstring, or sewn seam, depending on the bag type. Some bird seed bags are recyclable, but it depends on the bag material and local recycling rules are bird seed bags recyclable. Use that intentional entry point instead of cutting randomly, and you will avoid spills, ripped packaging you cannot reseal, and seed scattered across the floor. Once it is open, do a quick inspection before filling any feeder. Below is a full walkthrough by bag type, plus what to do if something goes wrong, and how to keep the seed fresh after opening.
How to Open Bird Seed Bag Without Spilling Safely

Maya Collins
17 May 2026
Know your bag type and closure before you start
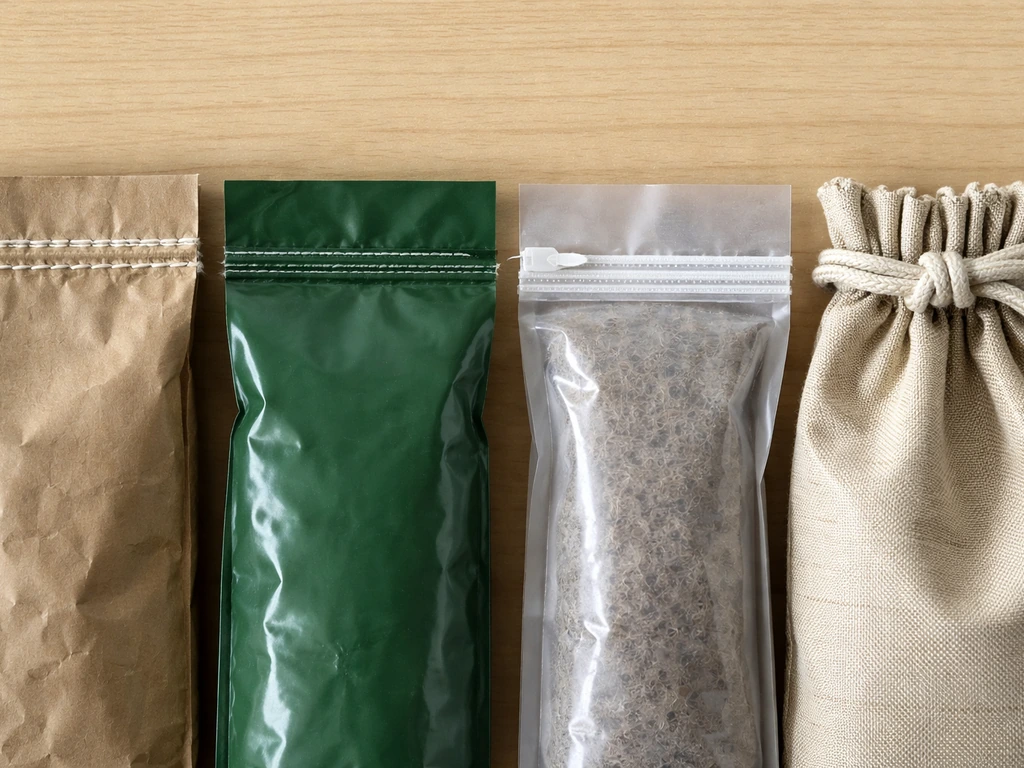
Bird seed comes in several very different packaging formats, and the right opening method depends entirely on which one you have in front of you. Getting this wrong is how bags rip apart and dump seed everywhere. Here is a quick guide to the most common types.
| Bag Type | Common Closure | How to Spot It |
|---|---|---|
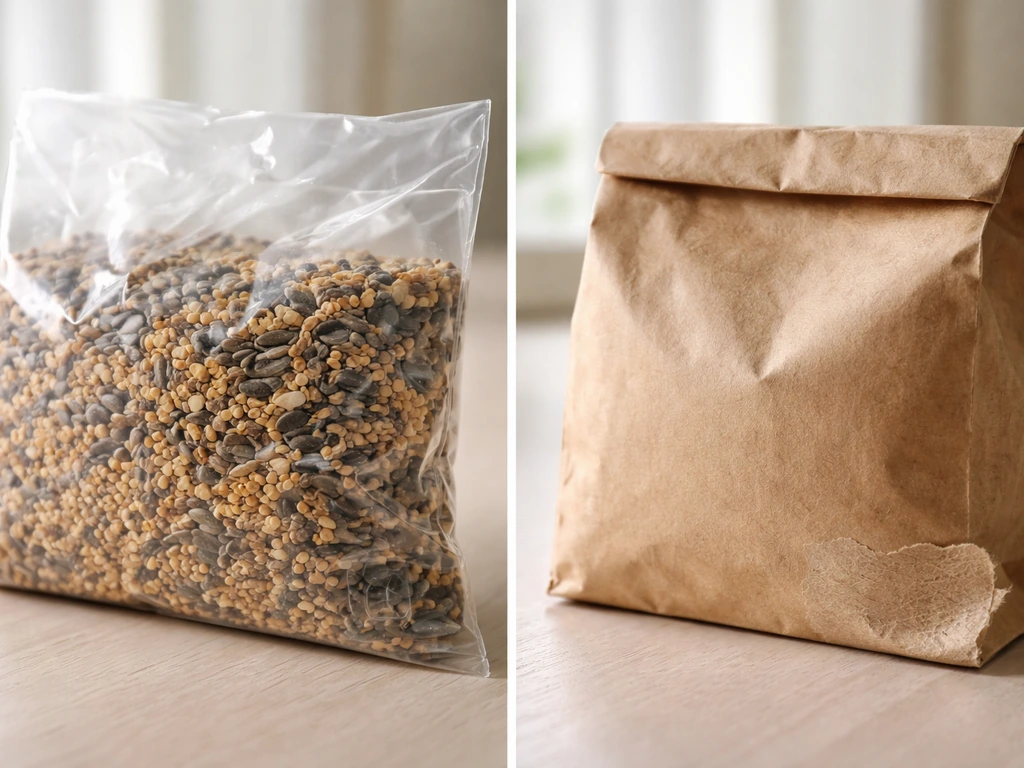
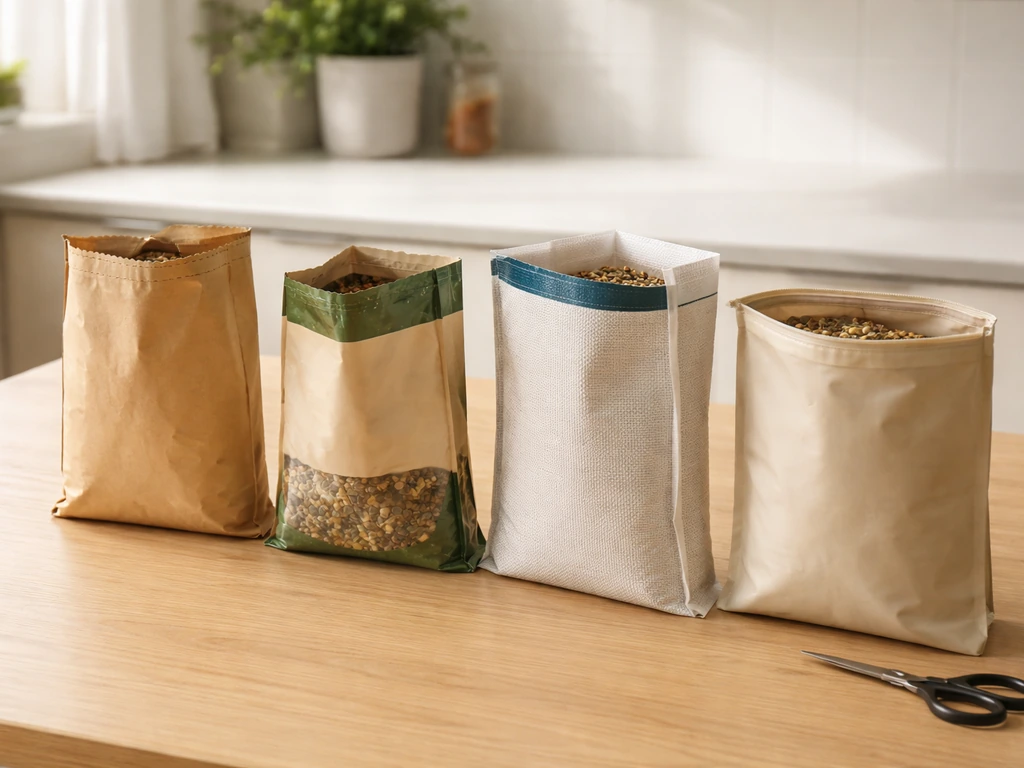
| Paper or paper-lined bag | Sewn thread seam or folded-and-glued top | Feels stiff, stitched thread visible across the top seam |
| Plastic-lined or laminated bag | Heat-sealed top, often with a tear notch | Shiny or semi-transparent top edge, small v-notch cut into the side |
| Woven polypropylene (woven poly) bag | Sewn seam, sometimes an EZ-Open strip | Rough woven texture, inner liner visible, may have a colored pull-strip |
| Stand-up resealable pouch | Zipper track above a heat-sealed bottom, tear notch above zipper | Zips open and shut, hermetic single-track slider or press-seal |
| Drawstring or cinch sack | Cord threaded through top hem | Rope or cord looped around the bag top, may have a cord lock |
| Bulk bag (FIBC / super sack) | Fill/discharge spout with drawcord and cord lock | Large, cube-shaped, industrial-weight woven poly, central spout at top |
| Bag-in-box (BiB) | Perforated outer carton flap, inner bag with a spout/tap | Cardboard outer box, spout visible through a cutout or hidden under a flap |
If you cannot immediately identify the closure, run your fingers along the top edge before reaching for scissors. The intentional opening point is almost always physically different from the rest of the seam, either notched, colored, or looser to the touch.
Step-by-step: how to open each bag type without spilling
Paper or paper-lined bags (sewn seam)
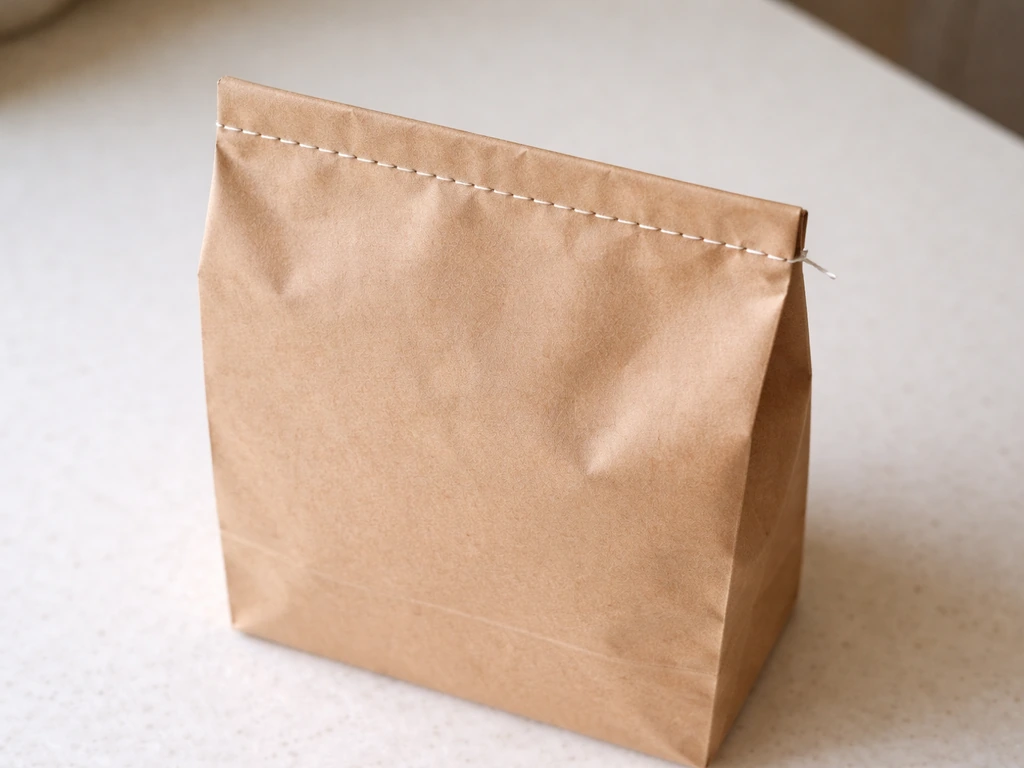
- Set the bag upright on a flat surface so it cannot tip.
- Look for a visible thread seam across the top. There will be a single loose thread end at one side, usually tucked in or slightly longer than the others.
- Pull that thread end firmly in one continuous motion across the seam. The whole stitch should unzip cleanly.
- If you cannot find the thread end, use sharp scissors to clip across the very top of the seam (not lower into the bag), then fold the top down to create a pouring lip.
- Never grip and yank the two sides apart. That tears the paper body, not just the seam, and you end up with a split bag that cannot be stored.
Plastic-lined or laminated bags (heat-sealed with tear notch)
- Find the tear notch, a small v-shaped cut on the left or right edge of the top seal. It is placed specifically above any zipper track so you tear into the right zone.
- Grip the bag on both sides of the notch and pull in opposite directions with steady, even pressure.
- If the bag has a zipper below the tear line, tear only to that zipper, then open the zipper to access the seed. Do not tear past the zipper.
- If there is no zipper, tear all the way across and fold the top edge down to form a pour spout.
- Hold the bag over a bucket or bin when you first open it, especially with larger bags, to catch any seed that shifts toward the opening.
Woven polypropylene bags (with or without EZ-Open strip)
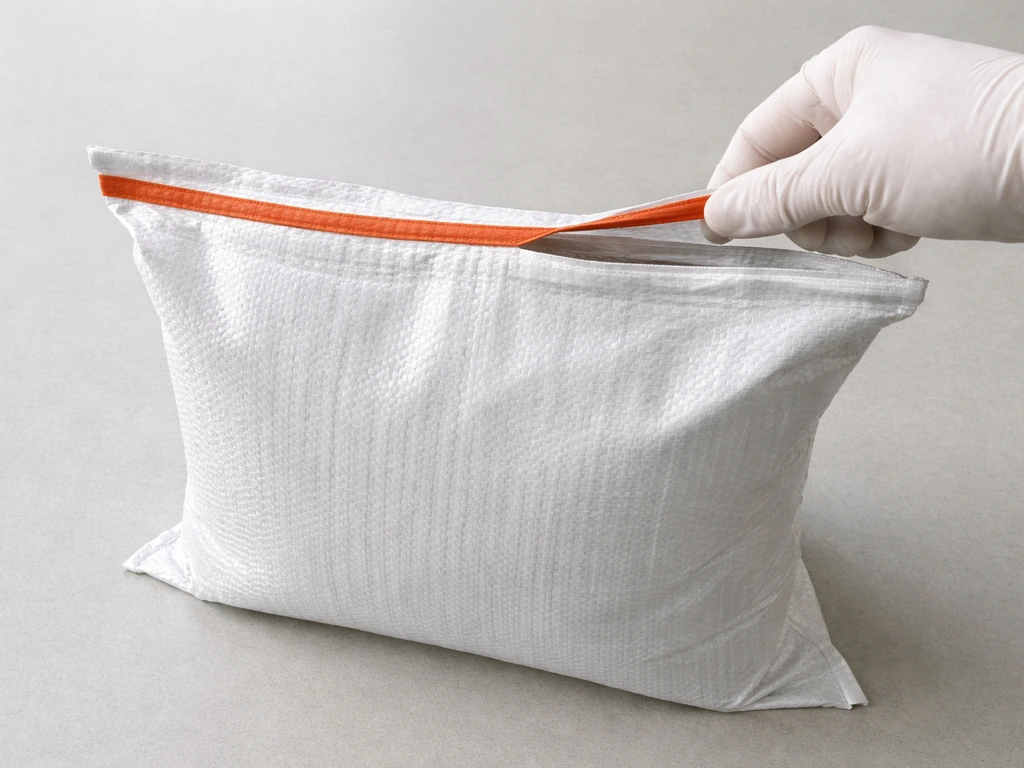
- Look for a contrasting-color pull strip running across the top. If present, grip it firmly and pull in one steady horizontal motion. This is the EZ-Open feature and is the cleanest method.
- If there is no strip, look for a sewn thread seam similar to a paper bag. Find the loose thread end and pull across.
- If neither is present, use heavy scissors or a box cutter to cut straight across just below the sewn seam. Cut slowly because woven poly does not stop a cut cleanly the way paper does.
- Woven poly bags often have an inner plastic liner. Once the outer seam is open, fold the liner back before pouring so it does not interfere.
Stand-up resealable pouches (zipper with heat seal)
- Find the tear notch at the top edge, above the zipper track. Tear across cleanly to remove the heat-welded portion.
- Once the sealed top is removed, press the zipper tracks together to confirm alignment, then slide or press open.
- On a gusseted stand-up pouch, the zipper opens wide because the gussets expand. This makes a natural pour spout. Tilt slowly.
- After pouring, press the zipper closed from one end to the other, squeezing out air before sealing for storage.
Drawstring or cinch sacks
- If there is a cord lock, press the button or tab on the lock to release tension before pulling the cord.
- Loosen the drawstring by pulling the two cord ends outward, not by pulling the bag away from the cord.
- If the cord is knotted and stiff, work the knot loose with your fingers rather than cutting. A cut drawstring cannot be retied reliably.
- Once open, fold the top of the sack down and over the outside to keep it out of the seed.
Bulk bags (FIBCs / super sacks)
- Confirm the bag is on a stable, flat surface or supported by a pallet before opening. These bags are heavy and will shift when opened.
- Locate the fill or discharge spout at the top center. It will be a fabric tube twisted and tied or secured with a cord lock.
- If there is a B-Lock cord lock, press the lock release and pull the cord to loosen. If tied, untie the knot rather than cutting.
- Untwist the spout and open just enough to scope or pour out the amount you need.
- Re-twist the spout, re-tie or re-lock the cord before moving or storing the bag.
Bag-in-box (BiB)
- Open the outer cardboard carton along its perforated or tabbed flap at the top.
- Locate the inner bag spout or tap, which may be folded inside or accessible through a side cutout.
- Pull the spout out through the cutout or remove the tap cap to dispense seed.
- Keep the outer carton intact for structure. It protects the inner bag and makes the system stable on a shelf.
When the bag just will not open cleanly
Even with the right technique, bags can give you trouble. Here is how to fix the most common problems without making them worse.
- Tear notch does not start a clean tear: The laminate may be thicker than usual. Use sharp scissors to cut from the notch point rather than tearing by hand. Dull scissors drag and cause jagged rips, so kitchen shears or box-cutter scored cuts work better.
- Zipper track is stuck or misaligned: Do not force it. Press the two tracks flat together from the back, align the profiles, then start the slider from one end. A tiny dab of food-safe lubricant (like a wax-based lip balm) on the track helps if it repeatedly sticks.
- Sewn seam thread breaks mid-pull: Grip the broken end with pliers or fingernails and continue pulling in the same direction. If the thread is gone entirely, cut across just above the seam with scissors.
- Woven poly bag frays when cut: Cut in one clean pass and immediately fold the cut edge away from the seed. Fraying strands can fall into the seed mix, so trim any loose fibers before pouring.
- Drawstring knot is cement-solid: Soak the knotted area with warm water for 30 seconds. This usually softens nylon or cotton cord enough to work the knot free without cutting.
- Bag ripped in the wrong place: Decant immediately into an airtight container. A torn bag cannot be stored safely, and exposed seed attracts insects and moisture within hours.
- Heat-sealed top will not tear at all: Some manufacturers over-seal. Score the very top edge lightly with a box cutter, then tear from that scored line. Do not cut deeper than 1 cm to avoid cutting into the seed.
Inspect the seed before it goes anywhere near a feeder
Opening the bag is step one. Before you scoop a single cup into a feeder, spend about 60 seconds looking at what is inside. This check catches problems that can harm birds or contaminate your feeders, storage containers, and yard.
What to look for
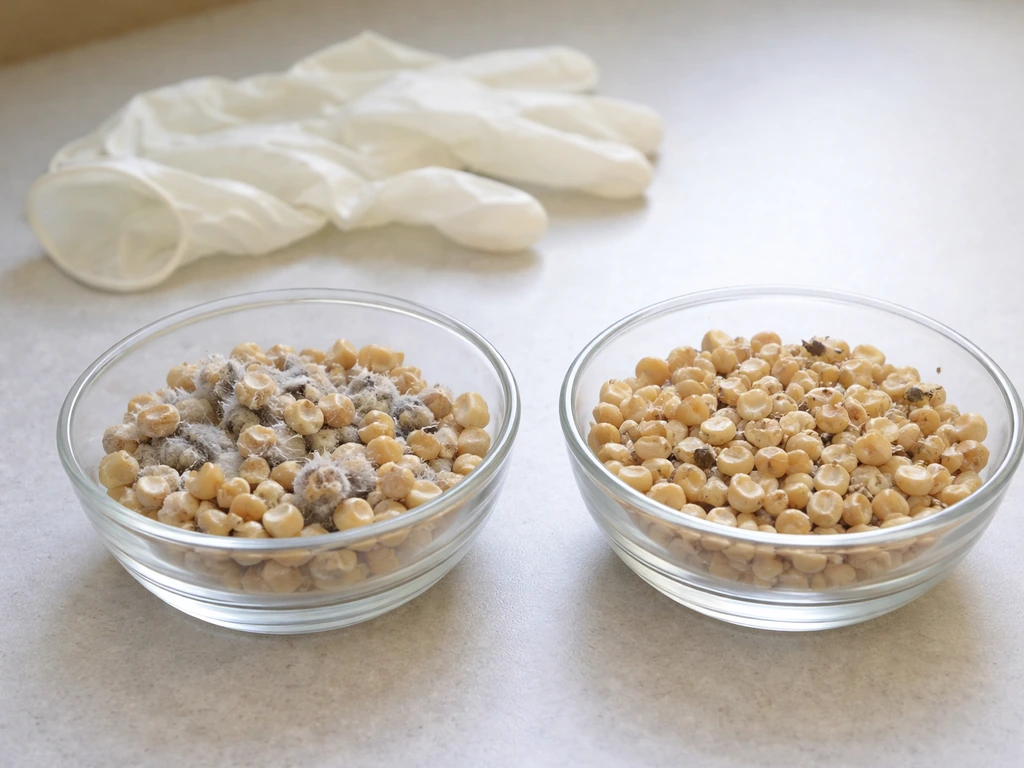
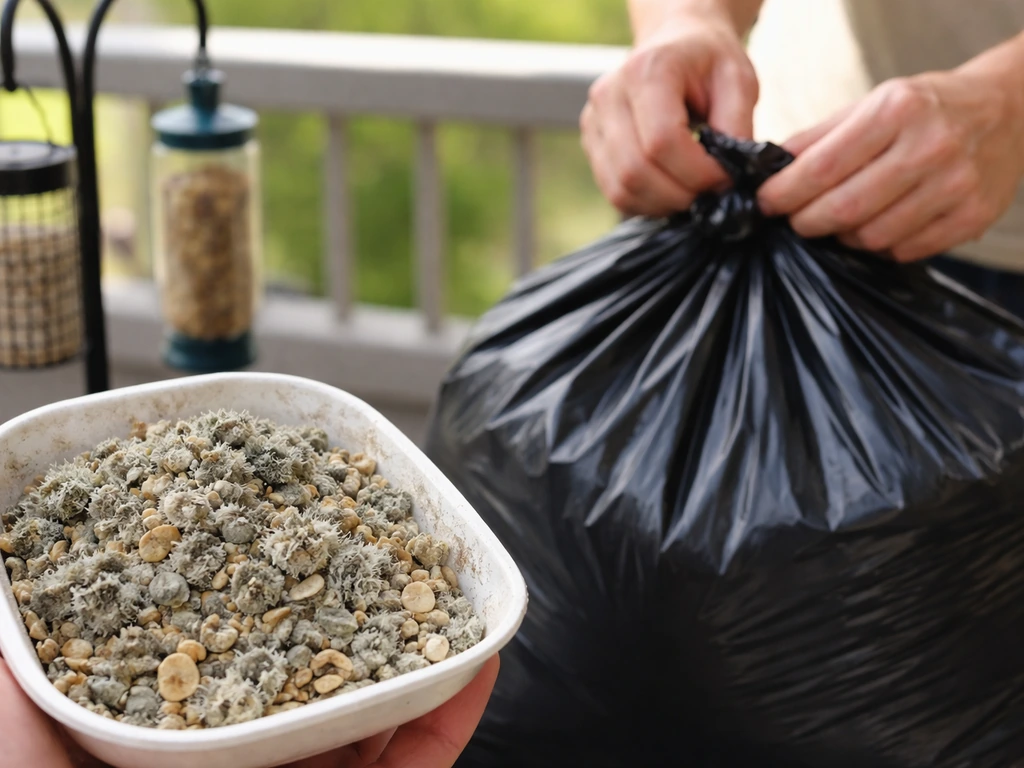
- Mold or clumping: Visible gray, black, or white fuzzy patches, or seed that is stuck together in solid clumps, indicates moisture has gotten in. Moldy or clumped seed should be discarded, not fed. A musty smell is enough reason to throw it out even if you cannot see mold yet.
- Wet or sprouted seed: Seed that feels damp, is visibly germinating, or smells fermented has already started to break down. Wet seed can cause serious digestive problems in birds. Discard it.
- Insect activity: Webbing (a sign of Indian meal moths or similar), live or dead insects, larvae, or small rice-grain-shaped cocoons all mean the seed has an active pest infestation. Do not pour this seed into a feeder or into your existing storage. Seal the bag in a trash bag and remove it from the house immediately.
- Dust or fine powder at the bag bottom: A small amount of seed dust is normal. Excessive powder with a rancid smell suggests the oils in the seed have gone off. That batch is past its useful life.
- Foreign material: Stones, debris, or clumped material that is clearly not seed. Remove before feeding.
If you find signs of pests like weevils or moths, the response is to confirm the pest, discard all affected seed, clean every container and surface that touched the seed, and then look at how the previous bag was stored, because pests almost always get in during storage, not at the factory. Freezing seed for 72 hours before storing is a proven method to kill any insect eggs that may have already been in a new bag before it reaches you.
How to store and re-seal the bag properly after opening
The moment a bag is opened, the clock starts on freshness and pest vulnerability. How you handle the next few minutes determines whether that seed stays good for weeks or starts going wrong overnight.
Best storage options after opening
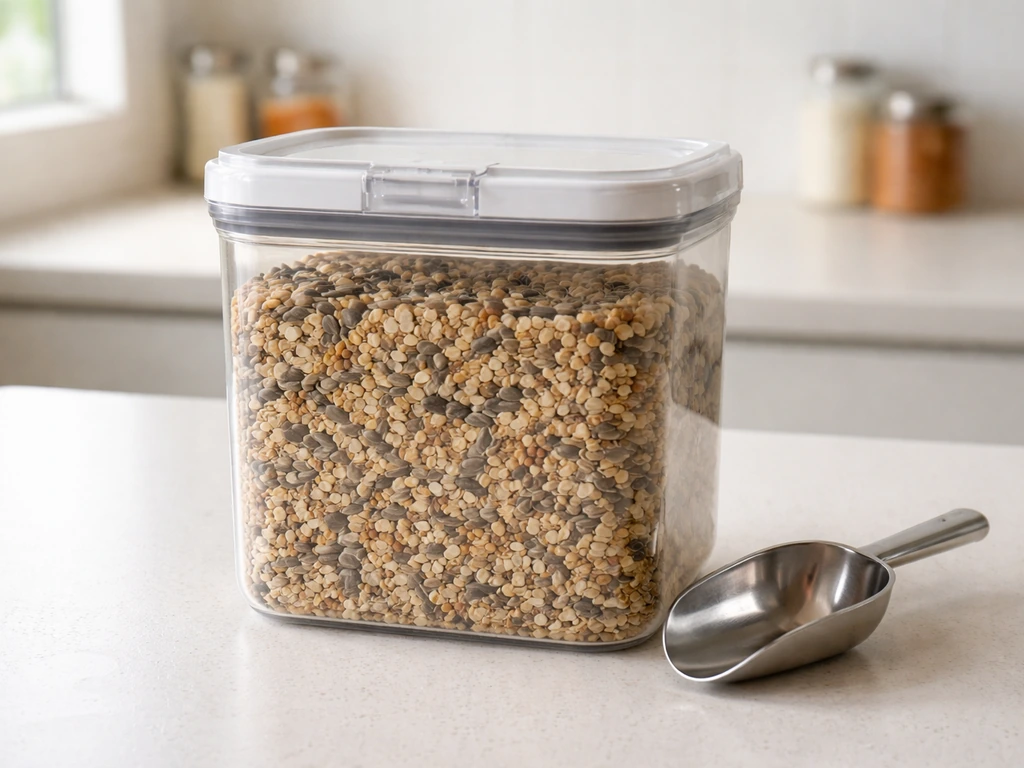
- Transfer to an airtight hard container: A metal or thick plastic bin with a locking lid is the gold standard. This blocks moisture, insects, and rodents. Metal is better in garages or sheds where rodents are a real concern, because mice chew through plastic.
- Use the original bag only if it reseals well: A quality zipper pouch can stay in use if you press all the air out before sealing and store it off the floor in a cool, dry location. A paper bag that you folded shut with a binder clip is not adequate for anything beyond a day or two.
- Freeze excess seed: Pack seed into airtight containers and freeze them. Frozen seed stays viable for months and freezing kills any insect eggs present. When thawing, let the sealed container come to room temperature before opening so condensation forms on the outside, not inside the container.
- Keep storage cool, dry, and dark: Heat and humidity degrade seed oils quickly. A garage corner in summer sun is a poor location. A basement, shed with good airflow, or climate-controlled space is far better.
Re-sealing specific bag types
- Zipper pouch: Close the zipper from one end to the other, pressing the track together firmly. Squeeze air out before the final 2 cm of closure.
- Paper bag: Fold the top down in three tight folds, then clip with a large binder clip or two. Store inside a sealed bin, because paper alone stops nothing.
- Woven poly bag: Fold the top down twice and secure with a clip or cable tie. Then store inside a hard bin.
- Drawstring sack: Re-cinch the drawstring tightly and retie or re-lock the cord. Store off the floor.
- Torn or damaged bag: Do not attempt to re-use. Transfer all seed to a hard airtight container immediately.
Cleanup and hygiene when seed spills or is contaminated
Spilled or contaminated seed needs to be dealt with quickly. Seed left on the ground under or near feeders is a well-documented driver of rodent activity, mold growth, and disease risk for birds. The Iowa DNR specifically flags cleaning up spilled seed and bird droppings below feeders as a key part of feeder hygiene.
Cleaning up a spill
- Sweep or vacuum up all spilled seed immediately. Do not leave it overnight.
- If seed spilled on a wooden deck or concrete, scrub the surface with warm soapy water to remove the oily residue that attracts ants and other insects.
- For spills on soil or grass, rake the area to break up clumped seed and expose it to air. Small ground-feeding birds like sparrows and juncos will often clean up the rest.
Cleaning contaminated feeders and surfaces
If you accidentally poured contaminated seed into a feeder before catching the problem, empty the feeder completely and clean it before refilling. The recommended disinfectant is a solution of 1 part bleach to 9 parts water. Scrub all surfaces, soak for a few minutes, rinse thoroughly, and let the feeder dry completely before adding fresh seed. A wet feeder causes the new seed to clump and mold within days. Clean feeders roughly every two weeks under normal conditions, and more often during wet weather or heavy use periods.
If you prefer not to use bleach, a 1 part white vinegar to 9 parts water solution works as a lighter sanitizing rinse, though it is not as effective against bacterial contamination as dilute bleach. Use vinegar for routine maintenance cleaning and bleach when you have had a confirmed contamination event.
For seed that has gone moldy in a bag or feeder, the cleanup rules are clear: discard all affected seed, clean every surface that touched it, and do not compost moldy bird seed without checking whether your compost setup can handle it safely.
Feeding opened seed safely: a quick species primer
Not all seed suits all birds, and knowing what you have in the bag helps you set up feeders correctly and avoid wasting seed that certain species will ignore. Black-oil sunflower seed is the most universally useful seed you can offer. It attracts the widest range of common backyard birds including cardinals, chickadees, finches, nuthatches, sparrows, woodpeckers, and jays. If you only open one bag, make it this one.
| Seed Type | Best For | Feeder Notes |
|---|---|---|
| Black-oil sunflower | Cardinals, chickadees, finches, nuthatches, sparrows, woodpeckers, jays | Works in tube, hopper, or platform feeders |
| Nyjer (thistle) | Goldfinches, house finches, pine siskins | Requires a feeder with small ports; standard feeders waste it |
| Peanuts (shelled or in-shell) | Blue jays, woodpeckers, nuthatches, crows | Offer in a mesh cage feeder or platform; check frequently for mold in wet weather |
| Mixed seed blends | Varies widely by blend | Offer in a platform feeder so birds can sort; avoid blends heavy in milo or filler grains |
| Safflower | Cardinals, doves, chickadees | Squirrels often avoid it, which makes it useful in problem areas |
Audubon consistently recommends offering different seed types in separate feeders rather than one big blend. This reduces waste, keeps hulls and uneaten seed from contaminating other seeds, and lets you track which seed your local birds actually use. If you are opening a bag of Nyjer for the first time, check that your feeder ports are small enough to hold it, because standard tube feeder ports let Nyjer pour straight through.
For hulled or de-hulled seed specifically, the handling process after opening the bag changes slightly because there is no protective shell. If you notice you are dealing with hulled or de-hulled seed, the same care steps apply, but the removal process depends on the type of hulls and whether you are separating them by hand or sorting by seed size Hulled seed spoils faster once exposed to air and moisture. Hulled seed spoils faster once exposed to air and moisture, so transfer it to an airtight container immediately after opening and use it within a few weeks rather than letting it sit in the original bag.
Once your seed is inspected, stored correctly, and matched to the right feeder, the work is essentially done. Keep the storage container off the floor, check it every week or two for any signs of moisture or insects, and clean your feeders on the same two-week schedule. That routine handles the vast majority of problems before they start. Bird seed can sometimes be composted if it is free of pesticides and you are composting small amounts, but it is best to compost it only when you know the seed is clean.
FAQ
What if my bird seed bag has no tear notch, pull-tab, or zipper, and I can’t find an intentional opening point?
Look for the weakest point along the top seam by running your fingers slowly, then check the very top edge for a thinner strip, reinforced fold, or colored band. If nothing is identifiable, use a small pair of scissors to cut only a narrow 1 to 2 inch section at the top, then transfer the seed to an airtight container instead of trying to reseal the bag.
Can I just cut the top off the bag to make it easier to pour?
It often increases spills and makes resealing impossible, and it exposes more seed to air and moisture than necessary. If you must cut, keep the cut close to the top edge (minimal opening), and plan to move the seed immediately into a storage container with a tight lid.
How do I open a bag of seed without losing any when it is stuck closed?
First, warm the bag slightly in a dry area (room temperature), then grip the top seam firmly on both sides and pull along the existing seam direction. Avoid yanking hard across the bag, which tears the film and widens the opening.
What is the best way to reseal a bag after opening?
Only reseal if the bag has a designed closure (zipper, drawstring, or reinforced top). Otherwise, pour into an airtight container, especially for hulled or de-hulled seed, since those varieties can spoil faster once exposed to moisture and air.
Should I wear gloves or a mask when opening a seed bag?
Gloves are useful if you suspect pests, see residue, or have sensitive skin, and a mask can help if you notice dust or mold. If you are dealing with any contamination signs, also clean the storage area and containers before refilling feeders.
How can I tell if the bag is contaminated before I even open it?
Check for powdery residue, damp spots, clumping, musty odor, or small insect activity around the seams and top edge. If you see moisture or pests before opening, don’t pour from that bag into feeders, discard it or follow the cleanup steps after confirming what is affected.
What should I do if I spill seed while opening the bag?
Pick up seed promptly and wipe the area where it landed, especially under and near feeders, because leftover seed can attract rodents and contribute to mold growth. If the spill involved visibly contaminated seed, treat the surface and containers that touched it before adding anything back.
Is it safe to store seed back in the original bag after opening?
It depends on the bag type and condition. If the bag tears easily or doesn’t have a real closure, the safest option is transferring to a sealed container. For hulled seed, transfer right away and use within a few weeks rather than leaving it in the open or loosely closed bag.
What is the safest approach if I open the bag and discover insects or larvae inside?
Confirm the issue, discard all affected seed, and clean every container and surface that contacted the seed. Then review where the bag was stored previously, because insects often get introduced during storage, not at the factory. For added assurance, freezing seed for 72 hours before normal storage can help kill any eggs present.
How should I open and pour Nyjer (thistle) seed to avoid losing it through feeder ports?
Open the bag normally, but plan for controlled transfers and check feeder port size before loading. Use a feeder with small ports designed to stop Nyjer from pouring straight through standard tube openings.