If your bird seed got wet, you can often save it by spreading it out to air-dry within the first few hours, but only if it shows no mold, no sour or musty smell, and no dark clumps. Seed that is just lightly damp from condensation or a brief rain shower is usually recoverable. Seed that has been sitting wet for more than 24 hours, smells off, or shows any fuzzy growth needs to go straight in the trash, because drying it does not eliminate mold spores and feeding it to birds can cause serious illness.
How to Dry Out Wet Bird Seed: Step-by-Step Guide

Maya Collins
1 Jun 2026
First, figure out what you are actually dealing with
Not all wet seed is the same, and the right response depends on how wet it is and how long it has been that way. Before you do anything, take a close look and a careful sniff.
Damp (surface moisture only)
This is seed that feels slightly tacky or cool to the touch, maybe got splashed by rain or picked up humidity overnight. The seeds look normal, smell clean and nutty, and do not clump when you squeeze a handful. This is the best-case scenario and the most salvageable.
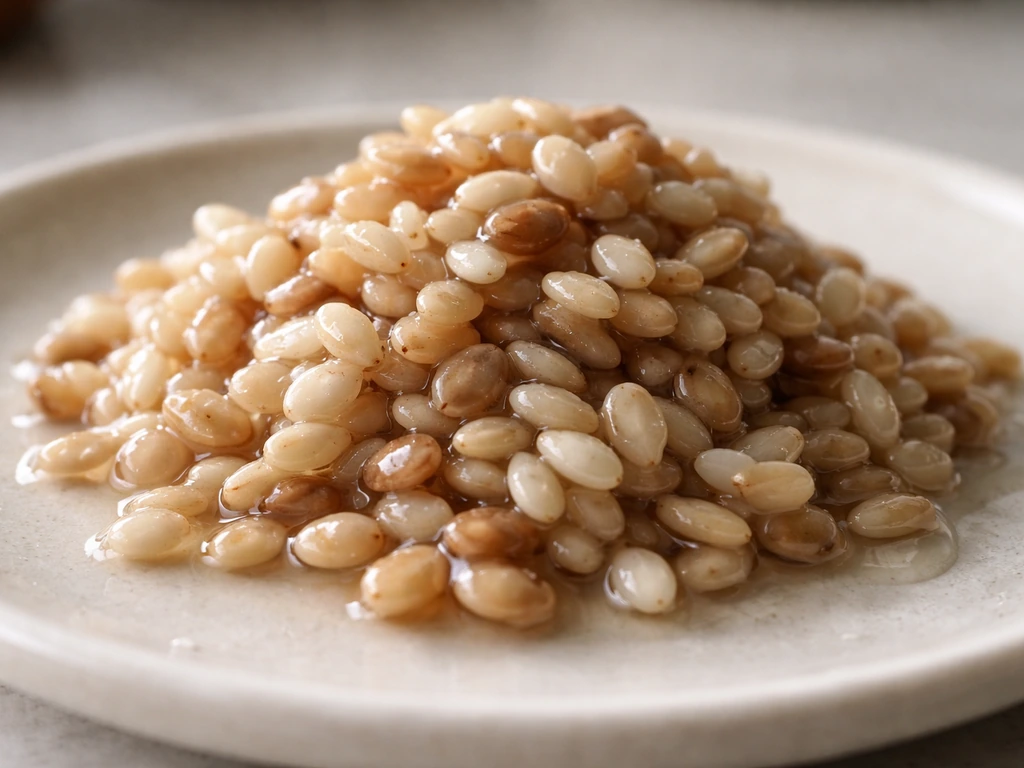
Soaked (wet through)
Soaked seed has absorbed water into the kernel itself. It feels heavy, seeds may swell or split, and a handful compresses into a solid mass. If this happened within the last few hours and there is still no odor or discoloration, you can attempt to dry it, but you need to act immediately and monitor it closely. Any delay and you will likely lose it.
Moldy or clumped
You will see fuzzy white, green, gray, or black growth on the seeds or inside the container. There may be visible threads or patches, and it will smell musty, sour, or earthy in a wrong way. Do not try to salvage this. Drying moldy seed does not kill Aspergillus fungal spores, and those spores are directly linked to avian aspergillosis, a respiratory disease that can be fatal to birds. Discard all of it.
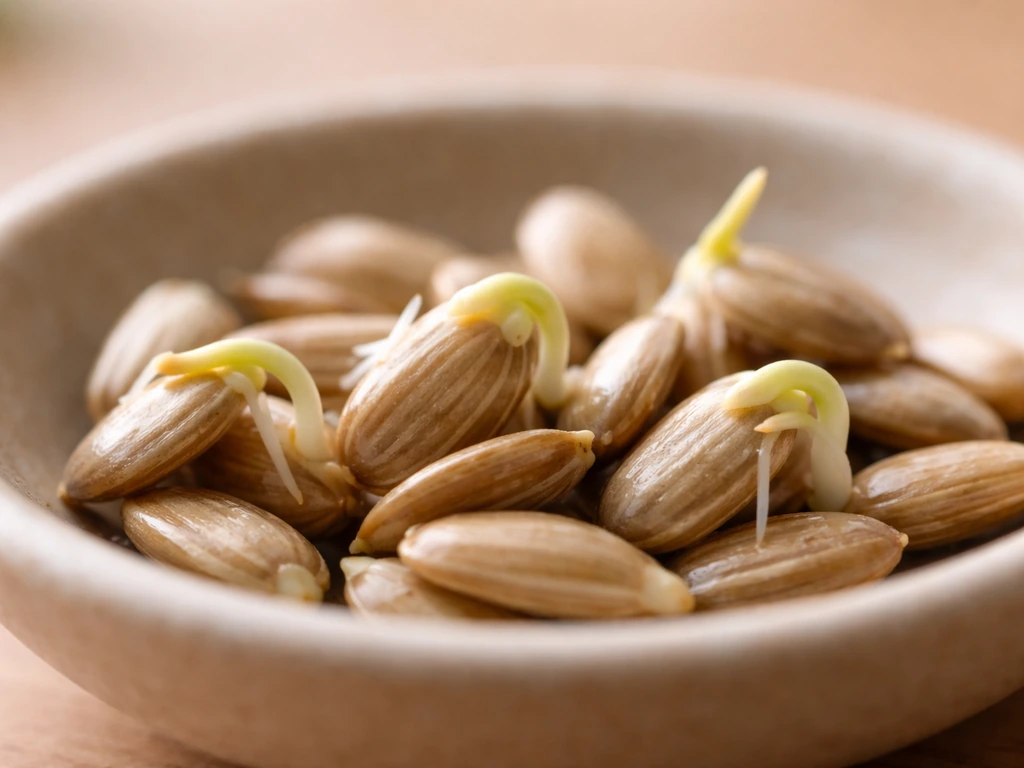
Sprouted
If you see tiny white rootlets or green shoots emerging from the seeds, they have germinated. Sprouted seed itself is not toxic to birds in the way mold is, but it signals that moisture has been present long enough for growth, which also means conditions have been right for microbial activity you cannot see. Sprouted seed sitting in a bin or feeder is on its way to rotting. Discard it from feeders and bins. If you are intentionally sprouting seed to feed as a fresh treat, that is a different situation handled separately from storage seed.
Quick triage: what goes in the trash and what you can try to save
Run through this checklist before spending time drying anything. Be honest about what you see and smell.
| Condition | What to do |
|---|---|
| Slightly damp, smells clean, no clumps, no color change | Try to save it. Spread and dry immediately. |
| Damp under 6 hours, minor surface moisture only | Good candidate for drying. Act now. |
| Soaked through but no odor or mold yet (under a few hours) | Attempt drying but watch closely. Discard if odor develops. |
| Any musty, sour, or skunky odor | Discard. Do not dry or feed. |
| Visible mold (fuzzy growth, dark patches, white threads) | Discard immediately. Sanitize container. |
| Clumped into solid masses, dark or discolored kernels | Discard. Likely already harboring mold internally. |
| Sprouted (rootlets or shoots visible) | Discard from storage. Not worth the hygiene risk. |
| Wet for more than 24 hours regardless of appearance | Discard. Too much time has passed. |
When in doubt, throw it out. A bag of seed costs a few dollars. A sick bird or a mold-contaminated feeder costs far more in time and frustration.
How to dry wet bird seed safely
Once you have confirmed the seed is worth saving, the goal is to remove moisture as fast as possible without cooking or damaging the kernels. Here are the methods that actually work, from simplest to fastest.
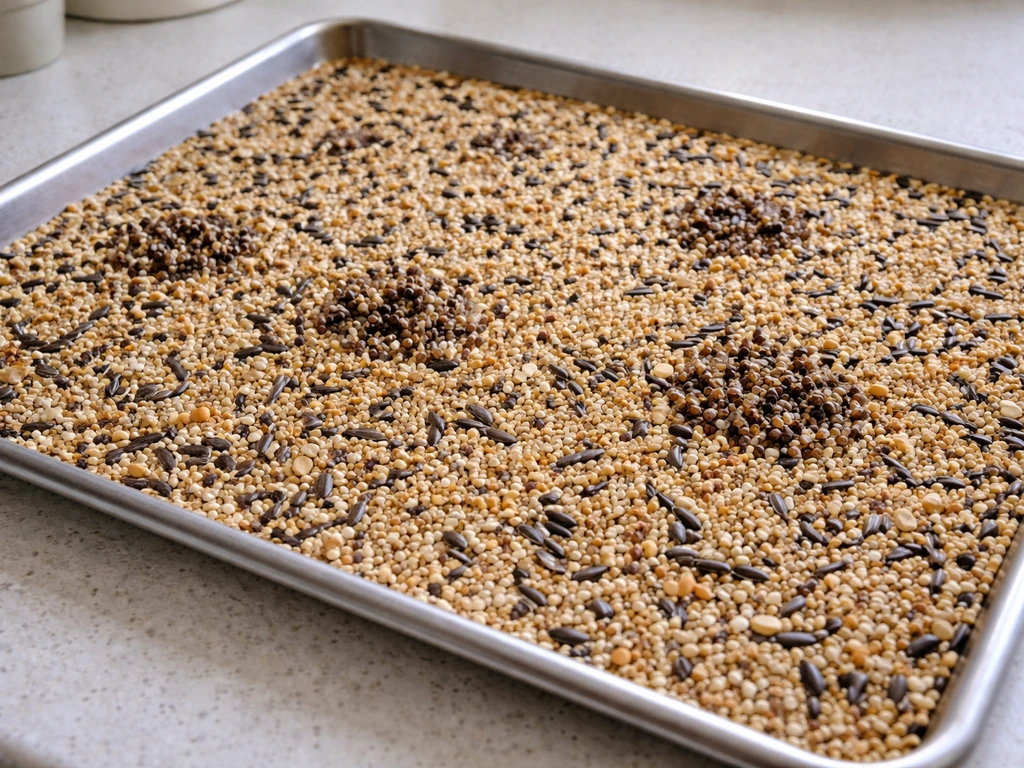
Air-drying on a tray (best default method)
Spread the seed in a single, thin layer on a clean baking sheet, shallow tray, or a piece of window screen laid flat. Thinner layers dry faster, so if you have a lot of seed, use multiple trays or work in batches. Put the trays somewhere with good airflow: a sunny windowsill, an outdoor table in dry weather, or a garage with the door open. Stir or turn the seed every 30 to 60 minutes so the damp seed on the bottom gets exposure. In a warm, breezy spot, lightly damp seed can be dry enough to store in 2 to 4 hours. Seed that was more thoroughly wet may take 6 to 12 hours.
Fan-assisted drying (faster)
Place your seed-covered trays in front of a box fan or a regular house fan set to medium. Moving air dramatically cuts drying time, often getting lightly damp seed dry in under 2 hours. This works especially well indoors when outdoor humidity is high, which is a common problem in humid summer climates or coastal regions. Keep the seed away from any dusty or dirty areas where the fan might blow debris onto it.
Low-heat oven drying (use carefully)
An oven set to the lowest possible temperature, usually 150 to 170 degrees Fahrenheit, can dry seed in 1 to 2 hours. Spread seed in a single layer on a baking sheet and leave the oven door cracked slightly to let steam escape. Stir the seed every 20 to 30 minutes. Do not go above 200 degrees or you risk cracking hulls, destroying oils, and making the seed less nutritious and appealing to birds. Let the seed cool completely on the tray before you store or use it. Warm seed sealed in a container will create condensation and undo all your work.
Food dehydrator (reliable and hands-off)
If you have a food dehydrator, this is a great option. Set it to around 95 to 115 degrees Fahrenheit and spread seed across the trays. Most lightly damp seed will be dry within 1 to 3 hours. The consistent low heat and built-in airflow make this one of the most controlled methods. Again, cool completely before storing.
What not to do
- Do not microwave bird seed. It heats unevenly, can ignite husks, and often cracks or scorches seeds.
- Do not seal seed in a bag or container while it is still warm or even slightly damp.
- Do not dry seed outdoors in humid or overcast conditions where moisture in the air will slow the process or rehydrate the seed.
- Do not stack seed in a pile to dry. Only a thin single layer works.
How to tell when the seed is actually dry
This part matters more than people realize. Seed that feels dry on the surface can still carry enough internal moisture to grow mold once it is sealed up in a bin. Check all three of the following before you put it away.
- Texture: Grab a handful and squeeze. Properly dried seed should flow freely and not compact or clump. Individual seeds should feel firm and dry, not soft, swollen, or slightly sticky.
- Sound: Sunflower seeds and larger kernels will make a dry rattling sound when you pour them from one container to another. Damp seed sounds muted and thud-like.
- Smell: Take a slow sniff close to the seed. It should smell neutral to slightly nutty. Any sour, musty, or fermented smell means moisture is still present or mold has already started.
- Color check: Look for any darkening, discoloration, or dull patches that were not there before. These can indicate seed that absorbed water into the hull and is deteriorating even without visible mold yet.
- The palm test: Press a small amount of seed flat in your palm for 10 seconds. If your palm feels noticeably cool or damp after, the seed is still releasing moisture.
If you are not sure, give it another hour on the tray and test again. It is faster to dry for longer than to deal with a moldy bin two weeks later.
Clean your containers and feeders before putting anything back
Wet seed almost always means a contaminated container or feeder. In general, keep bird seed shells dry and clean, and remove any shells that got moldy or heavily wet before birds can be exposed. Even if the seed itself looks fine, mold spores, bacteria, and residue may be left behind on surfaces. If you put fresh or dried seed back into a dirty bin, you are just starting the clock on another spoilage problem.
Sanitizing storage containers
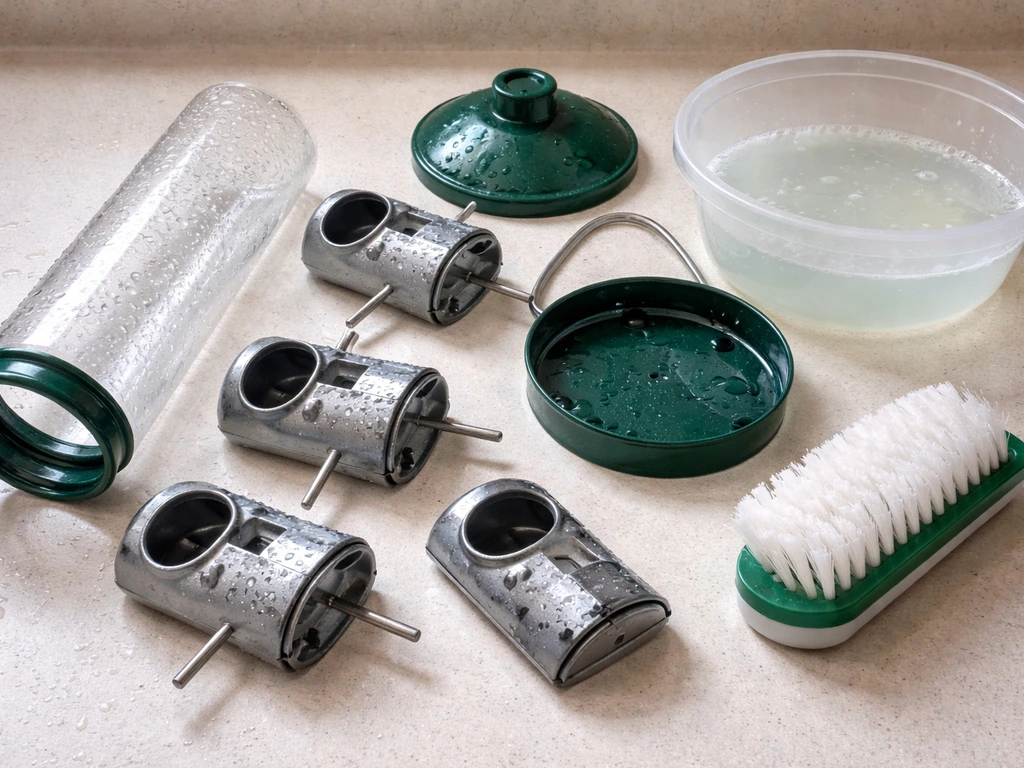
- Empty the container completely and shake out all debris.
- Wash with hot water and dish soap, scrubbing all interior surfaces and any lid seals or gaskets.
- Rinse thoroughly to remove all soap residue.
- Make a dilute bleach solution: 1 part household bleach to 9 parts water (roughly 1.5 tablespoons of bleach per cup of water).
- Wipe down or soak all interior surfaces with the bleach solution for at least 2 minutes.
- Rinse again with clean water and allow the container to air-dry completely, lid off, for several hours or overnight before adding seed.
Sanitizing feeders
Use the same dilute bleach solution on feeders. Disassemble the feeder as much as possible, scrub all seed ports, perches, and trays, and let it dry fully before refilling. Tube feeders and enclosed feeders trap moisture and moldy debris at the bottom, so pay extra attention to the lowest points where wet seed collects. Project FeederWatch recommends cleaning feeders every 1 to 2 weeks during active use, and immediately after any rain or moisture event.
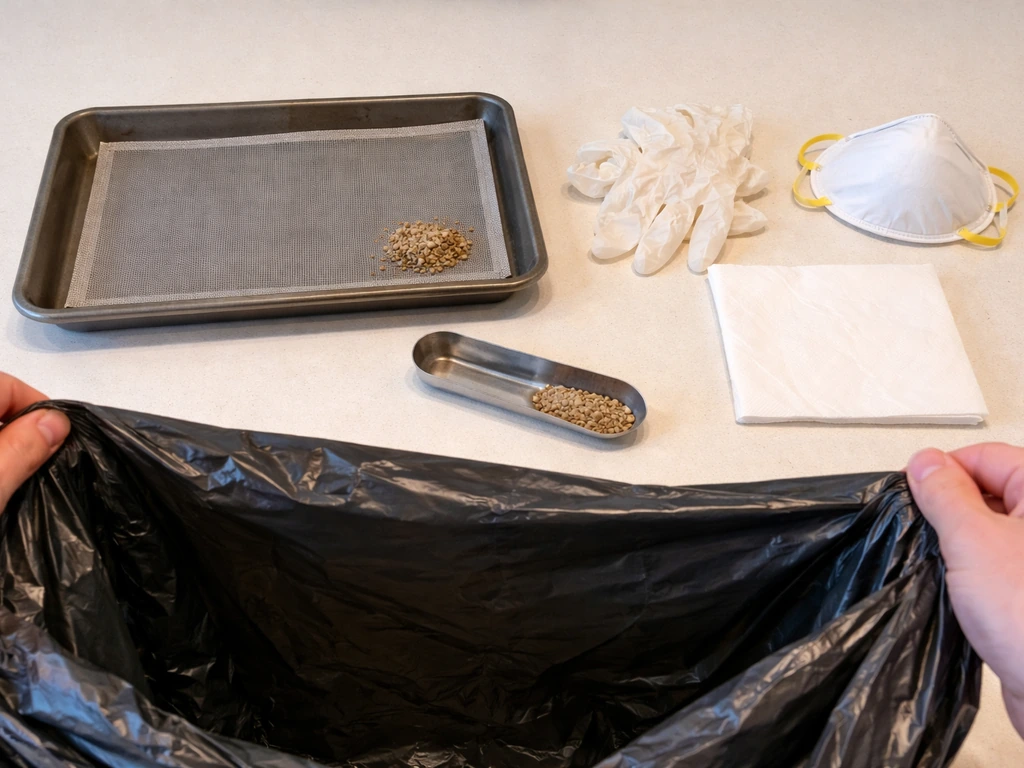
Handling moldy seed safely
When you are disposing of visibly moldy seed, try not to stir it up or pour it in a way that kicks spores into the air. Aspergillus spores are a real respiratory risk, not just for birds but potentially for people with weakened immune systems. Tip the moldy seed gently into a sealed plastic bag, then into your outdoor trash. Wash your hands thoroughly after handling it, and do not compost moldy bird seed.
Store it right so it does not get wet again
The best way to handle wet seed is to never have it happen again. Most cases of wet bird seed come down to the same few storage mistakes.
The right containers
Use a rigid container with a tight-fitting, gasketed lid. Metal garbage cans with locking lids work well for large quantities and are rodent-resistant too. Hard plastic bins with snap lids (like food-grade storage containers or dedicated seed bins) are also good. Avoid fabric bags, paper or cardboard packaging, open buckets, or any container that does not seal. Original seed bags are fine for short-term transport but not for storage, especially in garages or sheds where temperature swings cause condensation.
Where to store it
Keep seed in a cool, dry, well-ventilated space. A garage shelf away from exterior walls is reasonable in dry climates. In humid climates (the Southeast, Pacific Northwest, or anywhere with hot, wet summers), consider storing seed indoors in a basement or utility room, or adding a desiccant packet inside the container to absorb ambient moisture. Avoid storing seed directly on concrete floors, which can wick moisture into the bin from below. A wooden pallet, shelf, or even a couple of scrap boards underneath the container creates enough separation to help.
Buy only what you will use
Large quantities of seed sitting unused for weeks are far more likely to encounter moisture problems than seed you cycle through quickly. In general, aim to use up stored seed within 4 to 6 weeks of opening. If you consistently have leftover seed going bad, buy smaller quantities more often. This also keeps seed fresher and more appealing to birds.
Feeder placement matters too
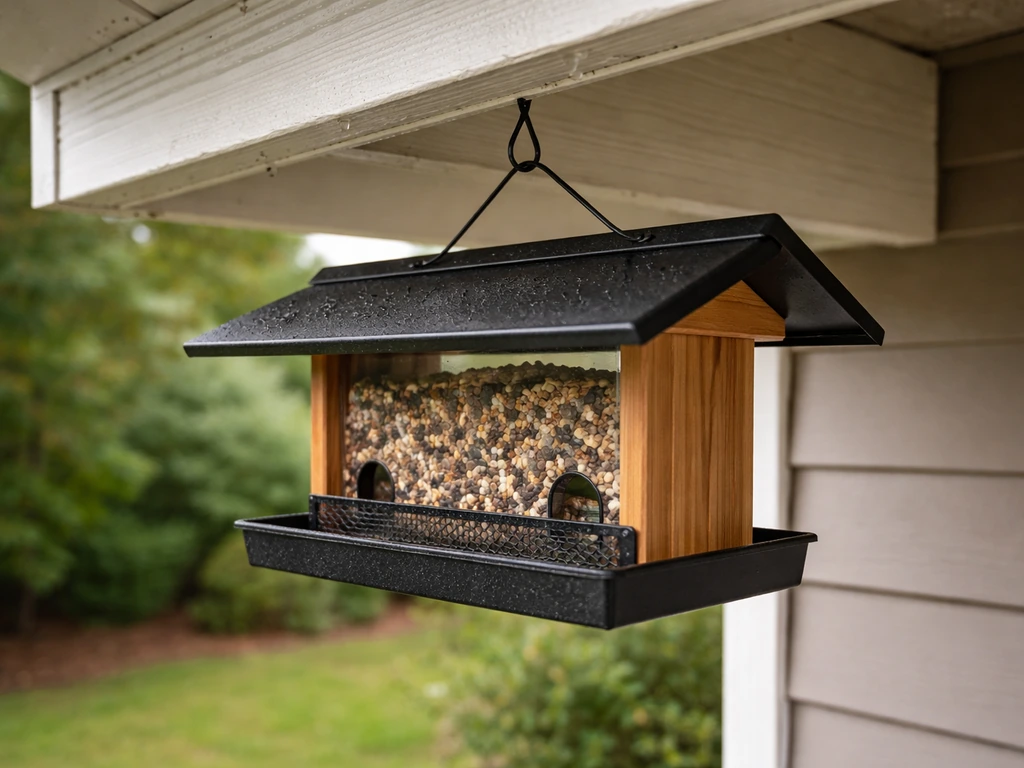
Even perfectly stored seed can get wet once it is in the feeder. Use feeders with weather guards or baffles that shed rain away from the seed ports. Position feeders under an eave or tree canopy if you can. Tray feeders are especially vulnerable to rain, so either choose models with drainage holes or switch to tube or hopper feeders in wet seasons. Emptying feeders before a heavy rain event and refilling after is a simple habit that prevents a lot of problems.
Is it safe to feed birds the seed you just dried?
Properly dried seed that passes all the texture, smell, and appearance checks is safe to put back out for birds. If you are using a Bird Buddy, you can follow the same dried-seed safety checks before you reload the feeder with dry seed put it back out for birds. You have removed the moisture that allows mold to grow, and as long as there was no mold to begin with, the seed is nutritionally intact. Birds are not especially sensitive to seed that got slightly damp and was dried correctly.
Where you need to be careful is with seed that was borderline, maybe smelled faintly off, or was soaked but showed no visible mold yet. The honest answer is that it is not worth the risk. Aspergillosis is caused by inhaling Aspergillus fungal spores, and the spores are microscopic. Aspergillosis happens when people or animals inhale Aspergillus fungal spores, which are commonly associated with moldy birdseed, decaying vegetation, and agricultural waste grains [Aspergillosis is caused by inhaling Aspergillus fungal spores](https://cwhl.
vet. cornell. edu/sites/default/files/2024-12/cwhl-fact-sheets-asperg. pdf).
You cannot see them on seed that looks clean. Mold can begin growing internally in wet seed within 24 to 48 hours under warm conditions, well before it is visible to the naked eye. Moldy bird seed is a documented source of this disease in wild birds, and feeding stations can concentrate birds in ways that turn a single contaminated feeder into a disease event.
The safe rule: if you have any doubt about the seed after drying, do not feed it. Use it as compost (if it is not moldy), bury it in the garden, or discard it. Fresh seed is cheap compared to the cost of sick birds at your feeder or a contaminated feeding station you have to deep-clean.
A note on pest risk from damp seed
Wet or damp seed also attracts rodents and insects faster than dry seed. The fermenting smell of damp seed is particularly attractive to mice and grain beetles. If your seed got wet because of a storage problem (a leaky bin or a poorly sealed garage), check around the storage area for signs of rodents before restocking. If you see evidence of pests, sanitize the area, seal any entry points, and store future seed in metal containers with locking lids.
A few connected problems worth knowing about
Wet seed often leads to follow-on issues. Seed that has been damp and then dried may still have husks and debris that clump together, which can clog feeder ports. Wet seed also germinates faster when spilled on the ground under feeders, which means weeds under your feeder can become a problem after a wet season.
If you are now seeing weeds under and around your feeder after a wet season, see how to get rid of bird seed weeds for targeted cleanup steps. And if you are dealing with a feeder that consistently collects water, it may be worth revisiting how you fill and maintain it, since getting seed placement right makes a real difference in how much waste and spoilage you deal with over time.
FAQ
Can I microwave wet bird seed to dry it faster?
It is not recommended. Microwaves dry unevenly, creating hot spots that can crack hulls or overheat the kernel, and they do not guarantee the internal moisture is removed. Use a fan, oven on low, or a dehydrator instead.
How can I tell if the seed is dry enough before I put it back in a sealed bin?
Do a “cool check.” After drying, let seed cool completely, then scoop a small amount into a clear container for 10 to 15 minutes. If you see condensation or the seed feels tacky again, it is not dry enough and should go back on the tray for longer.
Is it safe to feed partially moldy seed if I remove the visibly bad pieces?
No. Mold can start and spread internally before it is visible. If you see any fuzzy growth, dark patches, or musty odor, discard the entire batch and do not attempt to salvage by picking out sections.
What should I do if the wet seed is in its original bag and I cannot spread it?
Transfer it to a thin layer immediately. Sealed bags trap moisture and speed mold growth, even if the outside bag looks dry. If mold is present or the smell is off, do not try to dry inside the bag, discard it.
Can I dry wet bird seed and reuse it in bird feeders the same day?
Only if it has cooled completely and passes the texture, smell, and no-visible-mold checks. Avoid loading warm seed into a feeder, because sealed or enclosed feeder parts can collect moisture and restart spoilage.
If the seed smells only “earthy,” not strongly musty, can I still save it?
Be cautious. Earthy or off-odor can indicate microbial activity that may not be visible yet. If you are unsure after drying, discard it rather than risk contamination, especially if the seed was soaked or wet for more than a day.
Do I need to clean my feeders even if only the seed got wet, not the feeder itself?
Yes, especially if wet seed sat in the feeder or pooled at low points. Disassemble and scrub ports and trays, then fully dry before refilling, because residue and spores can remain on surfaces even when new seed looks fine.
Can I compost wet bird seed after drying it?
Composting is only reasonable for seed that was not moldy. If there was any fuzzy growth or musty odor, do not compost. Instead, bag it and dispose of it, then wash your hands thoroughly.
What about seed that has started to sprout, but I want to feed it?
Storage seed that has developed rootlets or shoots should not be returned to feeders or seed bins, since it is already in a breaking-down, contamination-prone stage. If you intentionally sprout for feeding, treat it as a separate, fresh-treat process, and do not mix it with stored seed.
Will drying remove the risk of Aspergillus spores from already contaminated seed?
No. Drying may stop visible growth but it does not reliably eliminate fungal spores. If any mold was present or the smell was wrong, discard the seed and sanitize any containers or feeders that may have contacted it.
Should I throw out wet seed immediately if I see tiny damp clumps forming?
If clumps form quickly and the seed feels heavy or internally damp, that usually means more than light condensation. When there is clumping plus any off smell, discard it. If clumps are minimal and there is no odor or discoloration, spread it thin right away and monitor closely while drying.
How do I prevent wet bird seed when humidity is high?
Use a gasketed, airtight container and store it off concrete on a shelf or boards. In humid climates, adding a desiccant packet inside the container helps buffer moisture swings, and cycling through seed within a few weeks reduces the time for moisture problems to build up.