
The bugs living in your bird seed are almost certainly one of three pantry pests: Indian meal moths, sawtoothed grain beetles, or rice weevils. All three are stored-product insects that treat dry seed the same way they treat any grain-based food. The good news is you can stop them today without any pesticides, and a few straightforward storage changes will keep them from coming back. These pests, including wild bird seed bugs like meal moths, beetles, and weevils, can be stopped with simple storage and cleanup changes. Treating flying bugs from bird seed usually starts with stopping the infestation in the seed itself and then cleaning the storage area thoroughly.
Bugs That Live in Bird Seed: Identify and Stop Them

Maya Collins
29 May 2026
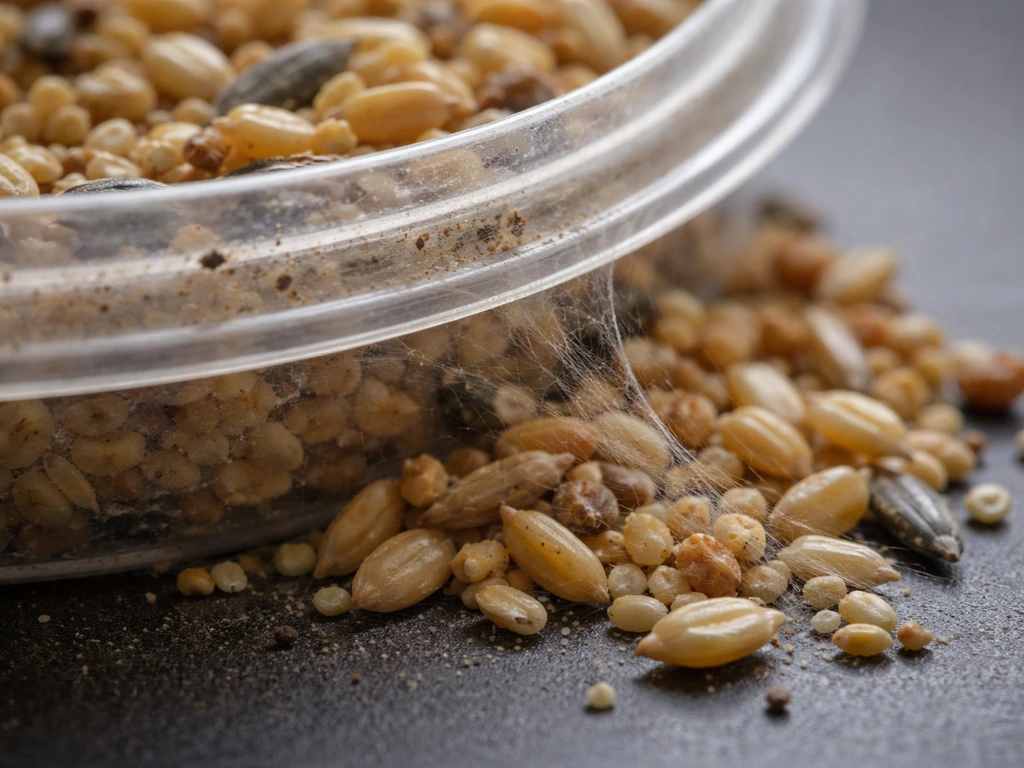
The usual suspects: what's actually living in your bird seed
Three insects account for the vast majority of bird seed infestations, and each leaves its own calling card.
Indian meal moth
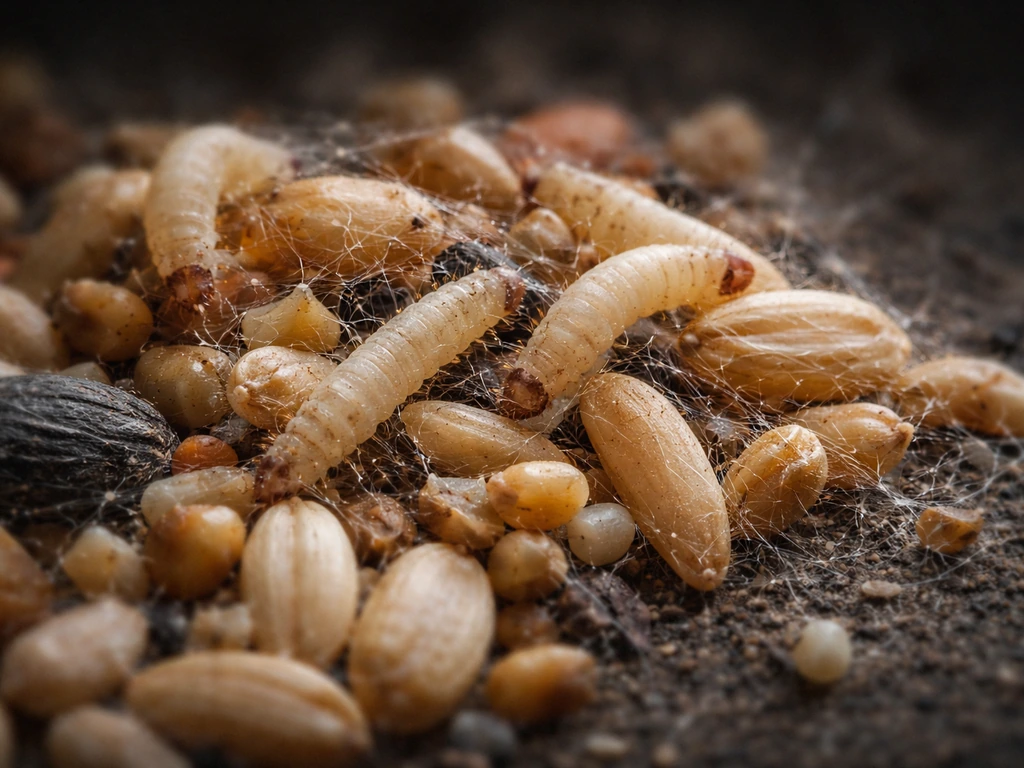
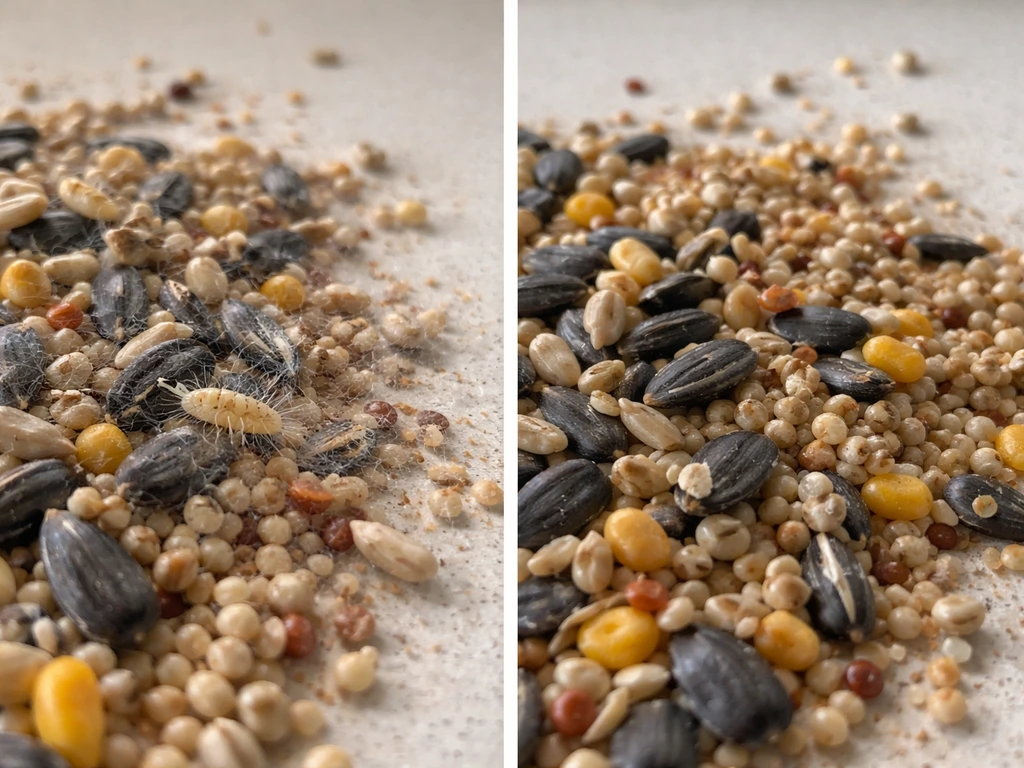
This is the most visually obvious one. The larvae are small, off-white caterpillars, and as they feed they spin silken webbing across the surface of the seed. That webbing is the giveaway: it mats the seed together into clumps and is often studded with tiny granular droppings called frass. Larvae feed for anywhere from 21 to 70 days depending on temperature and humidity before pupating. You may also notice small brownish moths fluttering around your garage, shed, or pantry even before you open the seed bag, because adults leave the food source to mate and lay eggs elsewhere.
Sawtoothed grain beetle
These are tiny, flat, reddish-brown beetles about 1/8 inch long. The defining trait is six tooth-like projections along each side of the thorax, which gives them a serrated outline under a hand lens. You'll usually see adults crawling through the seed rather than webbing it. Both adults and larvae feed on the seed, which means an infestation can build fast because multiple life stages are eating simultaneously.
Rice weevil and granary weevil
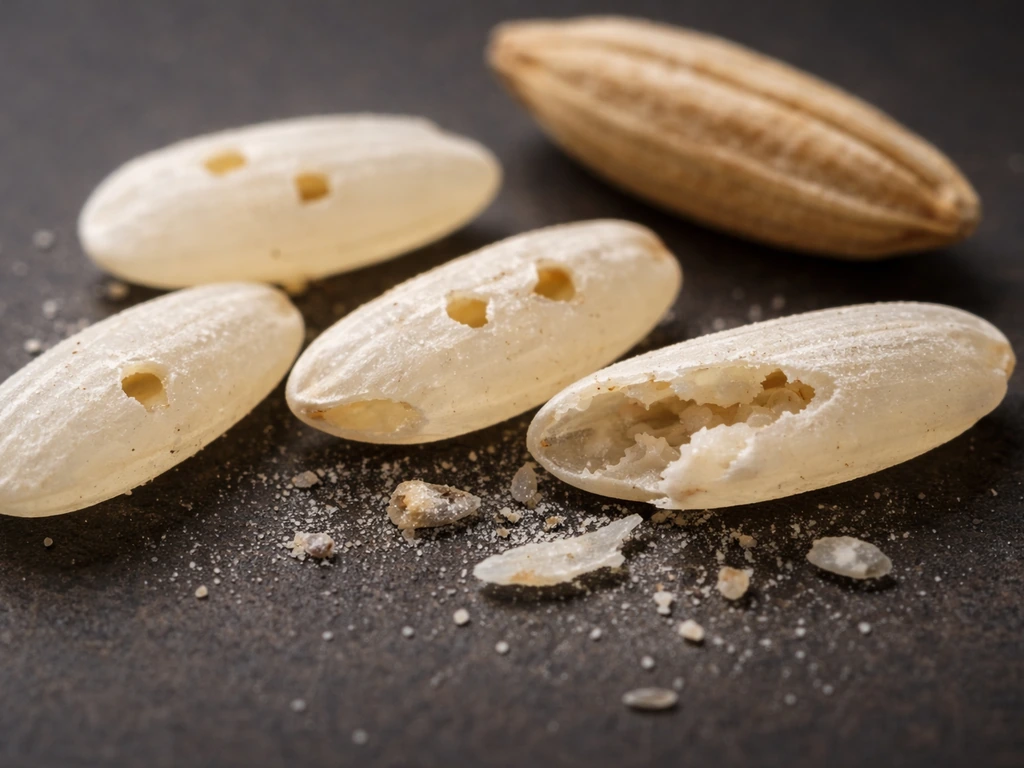
Weevils are sneakier because the larvae develop entirely inside individual kernels. The adult chews a hole, lays an egg, seals it with a secretion, and moves on. The larva feeds inside the kernel for around 18 days before chewing its way out, leaving a small exit hole. By the time you see exit holes in sunflower seeds or millet, the infestation is already well established. Adults are small, reddish-brown to dark beetles with a distinctive snout.
Less common but worth knowing
Dermestid beetles occasionally show up in dry seed, especially in seed that has sat for a long time or been contaminated with animal debris. Grain mites, which are nearly microscopic, are more associated with seed that has gotten damp and are often found alongside mold growth. If you are seeing extremely tiny moving specks and the seed smells musty, mites are the more likely culprit than beetles or moths. This is especially true for bird seed mites, which are tiny enough that they are often noticed only when you see movement or suspect a musty smell.
Real infestation vs. harmless debris: how to tell the difference
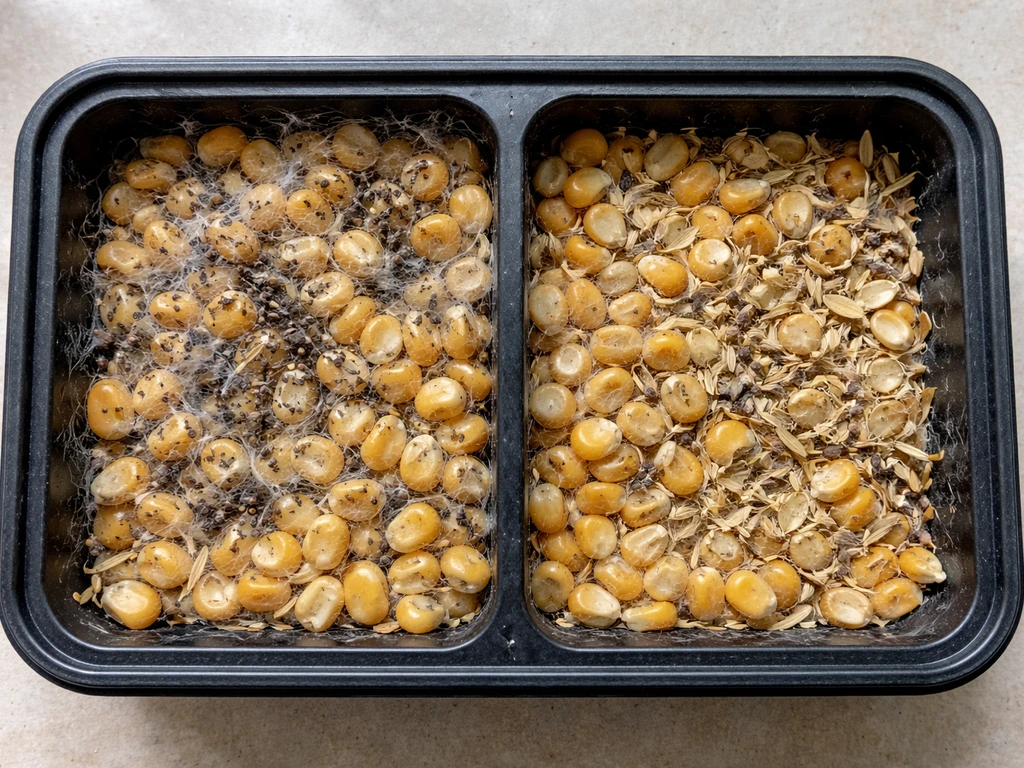
Not everything you see in seed is a sign of infestation. If you are wondering whether bird seed itself attracts bugs, the answer is yes, especially when it becomes contaminated, spills, or stays in warm, humid conditions does bird seed attract bugs. Seed hulls, broken shells, dried plant fragments, and even small bits of substrate from packaging look a lot like insect debris at first glance. Here is how to distinguish the two.
| What you see | Likely infestation sign? | What it actually is |
|---|---|---|
| Fine silken webbing matting seed together | Yes | Indian meal moth larvae feeding and spinning |
| Small granular pellets mixed into seed | Yes | Insect frass (droppings) |
| Exit holes in individual kernels | Yes | Weevil larvae emerging |
| Tiny pale/white worm-like larvae in seed | Yes | Moth or beetle larvae |
| Flat reddish-brown beetles crawling in seed | Yes | Sawtoothed grain beetles |
| Small moths near storage area | Yes | Indian meal moth adults |
| Empty seed hulls and husks | No | Normal seed coat debris |
| Clumped seed without webbing | Maybe | Could be moisture clumping, check for smell/mold |
| Dried plant matter or chaff | No | Normal seed filler material |
| Birds foraging in spilled seed | No | Normal wildlife behavior at feeders |
If you are unsure, spread a small amount of seed on a white paper plate and look at it in good light. Webbing, live movement, frass, or exit holes confirm a real infestation. Insect contamination also brings insect hairs, droppings, and secretions that give seed a faintly musty or off smell, which is different from the neutral, slightly nutty smell of clean seed.
Why these pests show up in the first place
Understanding the cause saves you from just repeating the same cycle. Bird seed infestations are almost always driven by one or more of the following conditions.
- Warm storage: stored-product insects thrive in temperatures above 65°F (18°C), and a garage or shed in summer can easily hit 80-90°F, dramatically speeding up their life cycles.
- Moisture: humidity above 60% encourages both insect activity and mold. Seed stored in a damp shed, near a water source, or in a container without a tight seal will attract pests faster.
- Open or inadequate containers: paper bags and thin plastic bags are no barrier. Most pantry-pest adults and larvae can chew through packaging, and eggs may already be inside the bag when you buy it.
- Large quantities stored for too long: buying a 50 lb bag and storing it for months without rotation creates a reservoir for any pest that entered early to breed unchecked.
- Spilled seed: seed on shelves, shed floors, or under feeders is a permanent food source that keeps pest populations fed even after you clean your main storage container.
- Certain seed types: millet, cracked corn, and milo are particularly attractive to stored-product insects because the kernels are easy to penetrate. Safflower and nyjer (thistle) are less commonly affected but still vulnerable.
- Pre-existing infestation: sometimes the seed was already infested before you bought it, especially if it sat in a warehouse or store in warm conditions. Moth eggs, in particular, are too small to see and may already be in the bag.
What to do right now: immediate steps today
Work through these steps in order. The goal is to stop the infestation from spreading to other seed, to your pantry, or to nearby stored items.
- Quarantine immediately: take the affected seed container outside or into an isolated space, away from other dry goods. Do not leave it in a shared garage shelf next to other seeds or pet food.
- Inspect every container: check every bag and bin of seed you have stored. Spread a small sample on white paper and look for webbing, larvae, frass, or exit holes. Healthy seed is clean, dry, and free of webbing or movement.
- Discard heavily infested seed: if you see dense webbing, large numbers of larvae, or a sour/musty smell, bag the seed in a sealed heavy plastic bag and put it in an outdoor trash can with a lid. Do not compost infested seed.
- Freeze lightly affected seed: if the infestation seems early and the seed looks and smells otherwise normal, you can kill insects at all life stages by placing the sealed bag or container in a 0°F (-18°C) freezer for at least four to seven days. This kills adults, larvae, and most eggs.
- After freezing, inspect again: once thawed, spread seed on white paper and check again before refilling feeders. Any seed with signs of active webbing or larvae should still be discarded even after freezing.
- Do not move infested seed through your home: carry it directly outside to minimize the chance of adult moths or beetles spreading to pantry foods.
Cleaning feeders, bins, and the storage area
Once you have handled the seed itself, clean thoroughly before putting any fresh seed back into the same container or feeder. Skipping this step is how infestations restart within weeks.
Storage containers and shelving
- Empty the container completely and take it outside.
- Use a dry brush or vacuum to remove all seed dust, frass, webbing, and larvae from every corner and crevice.
- Wash with hot soapy water, then rinse with a solution of 1 part white vinegar to 1 part water, or a dilute bleach solution (1 tablespoon of bleach per 1 gallon of water).
- Rinse thoroughly and let the container air-dry completely in sunlight before adding any new seed. Moisture in the container is one of the fastest ways to restart an infestation.
- Wipe down the shelf or area where the container sat. Frass and eggs can remain on surfaces and re-infest new seed.
- Do not spray pesticides near or inside seed storage containers. For stored-product pests, removal and sanitation are more effective and far safer than pesticide application.
Feeders and trays
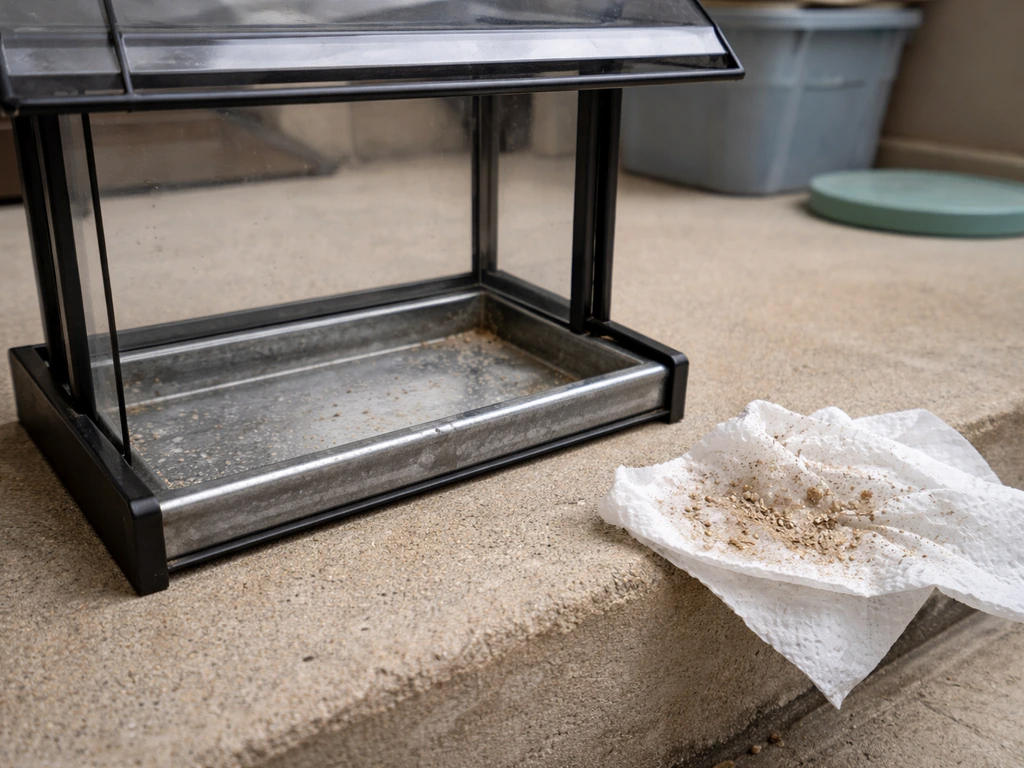
Even if the feeder itself wasn't the source of the infestation, it may harbor old seed, frass, hull debris, and droppings that attract pests and spread disease. Project FeederWatch recommends cleaning feeders about every two weeks, and more often during warm or damp weather. To clean properly: disassemble the feeder completely, discard all old seed, scrub all surfaces with a stiff brush and hot soapy water, then soak for a few minutes in a dilute bleach solution (1 tablespoon bleach to 1 gallon water), rinse thoroughly, and let it air-dry fully before refilling. Never put fresh seed into a wet feeder.
Under-feeder cleanup
Rake or sweep up all spilled seed, hulls, and droppings from the ground beneath your feeder. This debris is a secondary breeding ground for insects and a disease risk for birds. After raking, you can sprinkle a thin layer of agricultural lime about 1/4 inch deep over the bare soil to help neutralize bacteria. This step matters more in wet climates and during summer months when decomposition is fast.
Keeping pests out of your stored seed going forward
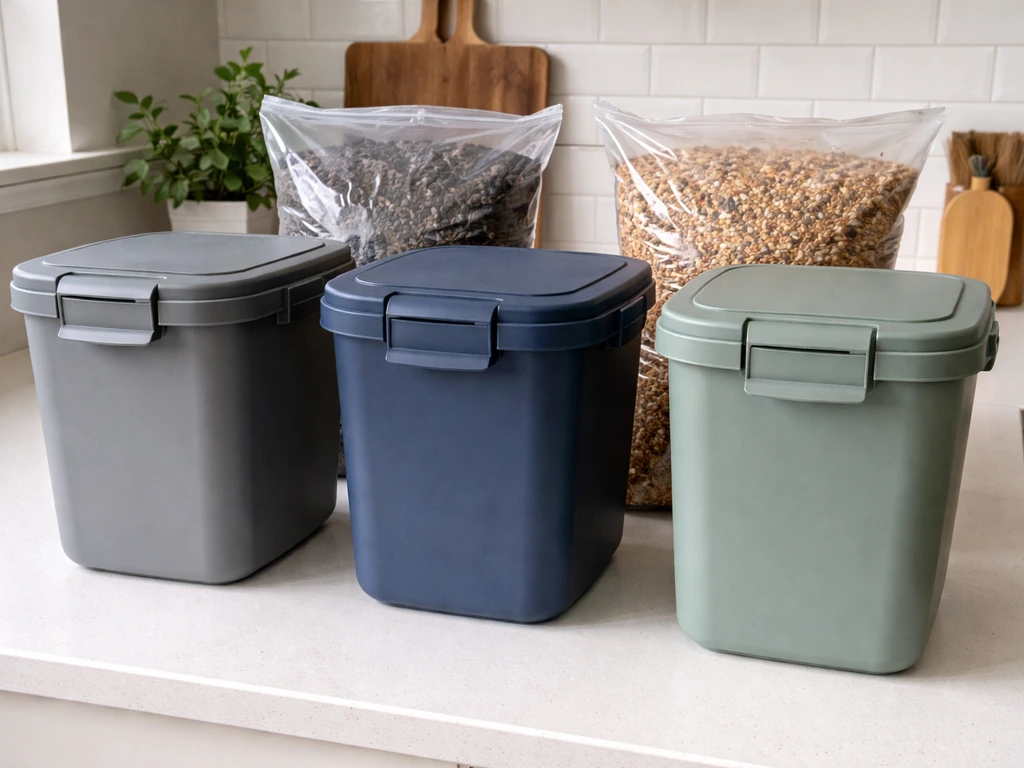
The best long-term fix is making your storage environment hostile to stored-product insects. These four factors do most of the work.
Use airtight, hard-sided containers
Transfer seed from paper or thin plastic bags into metal or thick hard plastic containers with tight-fitting lids immediately after purchase. Galvanized metal garbage cans with locking lids work well for larger quantities and also deter rodents. Thin plastic tubs are acceptable if the lid seals firmly, but check them regularly. The original packaging is not adequate for storage beyond a few days.
Buy smaller quantities and rotate regularly
A 20 lb bag used within four to six weeks gives pests far less time to establish and breed than a 50 lb bag sitting through an entire summer. Use older seed first, and do not pour fresh seed on top of old seed without checking the bottom of the container first. That bottom layer is where infestations typically start.
Store in cool, dry conditions
Cooler temperatures slow insect development significantly. If you live in a hot climate, consider a cool basement, climate-controlled space, or a garage with good ventilation rather than a hot, sealed shed. Humidity is equally important: keep seed off the ground (use a shelf or pallet) and away from any moisture source. A small desiccant packet inside the container helps in particularly humid regions.
Freeze new seed as a precaution
If you have had repeated infestations, or you buy seed in bulk, consider freezing new bags for four to seven days at 0°F before storing them. This kills any eggs that may have been present when you bought the seed and is especially useful in summer when warehouse and transport conditions may have already warmed the seed enough to allow eggs to develop.
Preventing pests at feeders and in the yard
Storage is half the battle. What happens at and around your feeder also matters, because spilled seed and ground debris are persistent pest habitat.
- Use a seed tray or catcher under the feeder to intercept spilled seed before it hits the ground. Empty the tray every few days rather than letting it accumulate.
- Switch to no-waste seed mixes or hulled seeds such as sunflower hearts if spilled hull debris is a persistent problem. Less debris on the ground means fewer pest microhabitats.
- Rake under feeders at least weekly during warm months. Decomposing hulls and wet seed on the ground attract both insects and rodents.
- Keep feeders away from structures and dense vegetation where adult moths and beetles can shelter. A feeder mounted on a pole in an open area is easier to keep clean than one hanging in a shrub.
- Avoid overfilling feeders. Only add as much seed as birds will consume in two to three days, especially during humid or rainy weather when wet seed spoils and attracts pests quickly.
- Check feeder ports and seed ports for any buildup of old compacted seed, which can harbor larvae even when the main seed reservoir looks clean.
- In regions with very hot, humid summers (the Southeast and Gulf Coast especially), plan for more frequent feeder cleaning and smaller seed refills, as warm conditions dramatically accelerate insect life cycles.
When the seed itself is the problem: mold, wet seed, and unsafe conditions
Pests and mold often arrive together because the conditions that encourage one encourage the other. Seed that has gotten wet, whether from rain, condensation, feeder leaks, or damp storage, is at high risk for both mold growth and mite activity. Grain mites in particular are tightly associated with damp, moldy seed.
You should discard seed immediately and without hesitation if you notice any of the following: a sour, musty, or fermented smell; visible mold growth (gray, green, or black fuzzy patches); seed that is clumped into solid masses without any webbing (wet clumping rather than webbing-based clumping); or seed that feels damp or oily rather than dry and loose. Moldy seed can carry mycotoxins and harmful bacteria that are dangerous to birds. Do not try to dry it out and reuse it.
If seed in your feeder has gotten wet from rain, empty the feeder entirely, clean it as described above, and let it dry completely before refilling. During prolonged wet weather, it is better to bring feeders in temporarily or switch to covered tube feeders than to keep refilling a feeder that is cycling through wet, spoiled seed every few days.
For your stored supply, if any part of the bulk seed is wet or smells off, treat the entire container as compromised. Mold can spread through a container quickly, and partial contamination is hard to reliably sort out. When in doubt, discard the batch, clean the container thoroughly, and start fresh. The cost of a new bag of seed is far less than the risk to the birds you are trying to feed or the hassle of a full re-infestation.
One more thing worth knowing: if you find bugs in your bird seed, it is worth checking nearby stored goods in the same space. Indian meal moths in particular will readily move from bird seed to grains, pasta, flour, and cereals stored nearby. A full inspection of adjacent shelving is a smart final step once you have dealt with the seed itself.
FAQ
Are the bugs in bird seed harmful to birds if I remove the seed and clean the feeder right away?
Usually not if you stop exposure quickly, but do not rely on quick removal alone. If the seed is clumped with webbing, has frass, or smells musty or fermented, treat it as spoiled and discard it, because mold and bacteria can develop even if you cannot see them.
What should I do if the only sign is tiny movement in the bag, but I do not see webbing or exit holes?
That pattern fits cases like grain mites or very early beetle activity. Use the paper-plate check in good light, then examine the seed for musty odor, and confirm whether the “specks” are moving. If the seed smells off or feels damp, discard instead of trying to sift it.
Can I salvage seed that has some damaged kernels or a few exit holes?
If you see exit holes or larvae damage, the infestation is already established internally, so “saving the good-looking parts” usually does not work reliably. The safer approach is to discard the whole lot, clean the container and feeder thoroughly, and restart with verified dry seed.
Do bugs in bird seed mean I will also have an infestation in my kitchen pantry?
Not always, but it is common for Indian meal moths to spread to other dry foods in the same area. After you deal with the seed, inspect adjacent shelves and discard any obviously contaminated pantry items, especially flour, cereal, pasta, and grains stored nearby.
How do I know whether the “debris” I see is insect frass or just seed hull dust and packaging particles?
Frass is often darker and irregular, and real infestations typically show at least one confirmable sign like live movement, webbing, consistent off odor, or small exit holes. Spread seed on white paper and compare, then check for an insect-like smell that is faintly musty or sour, not just the normal nutty odor of clean seed.
Should I freeze all my remaining bird seed after one infestation, or only the bag I think is affected?
If you have repeated infestations, or you bought seed in bulk from the same batch, freezing the remaining unopened or closely related bags is a practical “belt-and-suspenders” step. For opened seed, freezing can help, but you still need to discard any spoiled, wet, or strongly odorous portions and clean the storage container because debris and eggs can persist there.
Is cleaning the feeder once enough, or do I need to repeat it?
Plan on repeating if you had visible larval signs, webbing, or lots of hull debris. After your first deep clean and dry-out, monitor for 1 to 2 weeks, because adults may still emerge from eggs in leftover debris unless the feeder and surrounding catch area are fully cleared.
Do desiccant packets actually help, or are they unnecessary if the seed is already dry?
They can still help, especially in humid climates or if the container is not climate-controlled. Desiccants reduce moisture uptake that can trigger mites and mold, but they are not a fix for wet contamination. If the seed ever got damp, you still need to discard spoiled seed and clean everything thoroughly.
Can I dry out moldy bird seed and reuse it to save money?
No. If you see mold growth or the seed smells sour, musty, or fermented, discard it immediately. Drying after mold or bacterial growth is not reliable, and mold can produce mycotoxins that remain even if the surface looks drier later.
What should I do with spilled seed and hulls under the feeder, and does the lime step always matter?
You should remove spilled seed, droppings, and hull debris because it can stay as an insect breeding site. The thin agricultural lime layer is most beneficial in wet climates and summer when decomposition is rapid, but even without lime, regular raking and a clean ground zone reduce reinfestation pressure.
Next Articles
Wild Bird Seed Bugs: Identify, Fix, and Prevent Fast
Identify insects in wild bird seed, stop infestations today, and prevent mold with safe cleaning and storage steps.
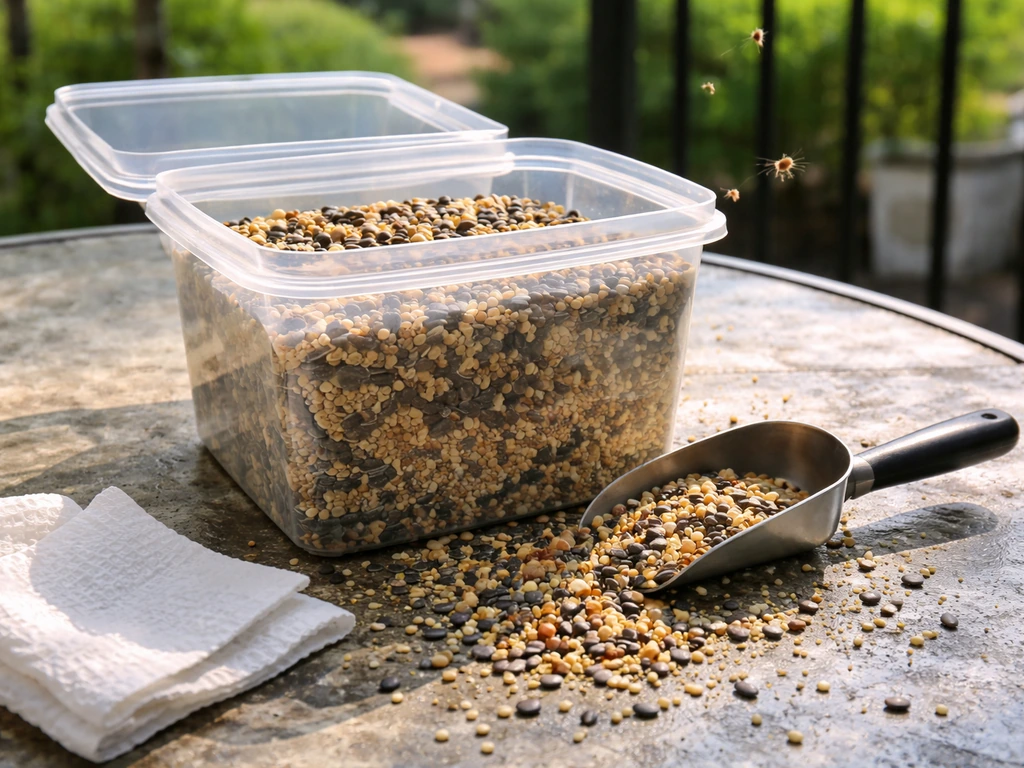
Flying Bugs From Bird Seed: Fix It Fast and Prevent It
Stop flying bugs from bird seed fast with checks, safe cleanup, proper storage, and prevention steps to protect birds
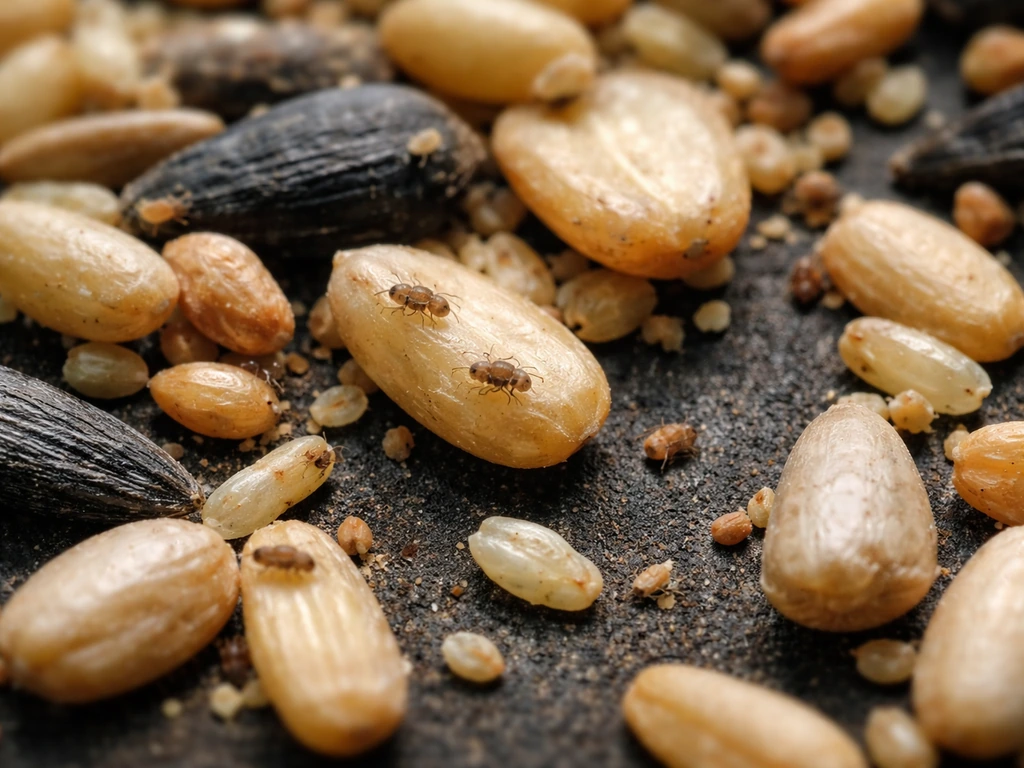
Mites Tiny Bugs in Bird Seed: Quick Fix and Prevention
Identify mites or seed pests in bird seed, stop spread fast, clean feeders, and prevent reinfestation with safe storage