Yes, you can sprout bird seed for chickens, and it works well as a supplemental feed boost, but only if you start with the right seed and follow basic food-safety habits. The seeds in most commercial bird seed blends will germinate just fine. The real risk is not the sprouting itself; it is the warm, wet conditions that can turn a tray of promising sprouts into a mold or bacterial hazard faster than most people expect. Get the seed selection, rinsing schedule, and tray hygiene right, and sprouted bird seed becomes one of the cheapest, most nutritious treats you can give your flock.
Can You Sprout Bird Seed for Chickens? How to Do It Safely

Maya Collins
7 Jun 2026
Which bird seed can be sprouted for chickens (and what to avoid)
Most bird seed sold at farm stores or garden centers contains grains and grass seeds that chickens thrive on. Millet (white and red), milo (sorghum), sunflower (hulled or black-oil), safflower, wheat, oats, and whole corn all sprout reliably and are perfectly safe for chickens when properly prepared. These are the same feed grains that poultry extension programs recommend as supplemental scratch grains, so you are not working with anything exotic.
A few things to screen for before you buy or use a bag of bird seed for sprouting:
- Treated or coated seed: Many seeds sold for planting (and occasionally mixed into cheap bird seed bags) are coated with fungicide or pesticide dressings. These coatings are not safe to eat. Look for seed labeled as untreated, food-grade, or intended for sprouting or animal feed. If the bag lists any seed treatment or shows dyed/colored seeds, skip it.
- Mold-prone blends with fine dusty fillers: Blends packed with tiny fine-ground particles or hull dust trap moisture and go moldy fast. Stick to clean whole-grain blends.
- Nyjer (thistle) seed: It sprouts poorly and has little practical value as chicken feed.
- Peanuts and peanut pieces: These harbor aflatoxin-producing molds, especially when wet. Avoid sprouting any peanut-heavy blends.
- Old or questionable seed: Seed that has been stored in a damp shed, smells musty out of the bag, or has visible clumping has likely already started degrading. It will not sprout well and may already carry mold.
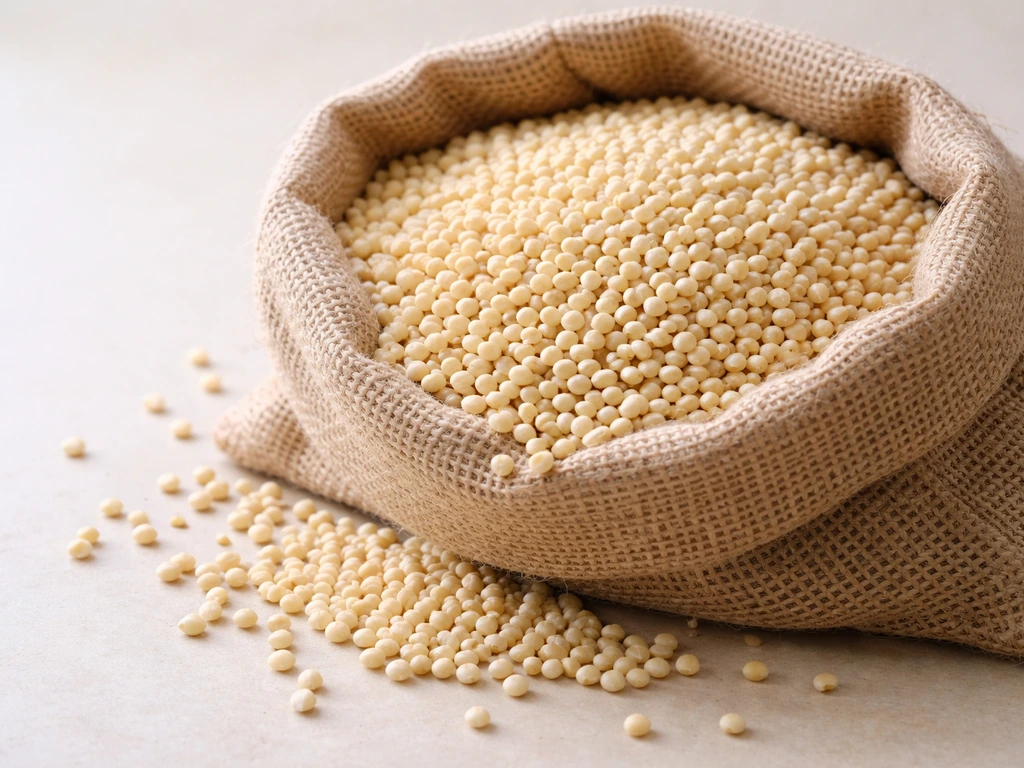
If you want a reliable, low-cost sprouting seed, a plain millet or milo blend, or a straight bag of whole wheat or oats from a feed store, is your best starting point. You can also use bird seed for microgreens, but the same safety and storage rules apply to prevent mold and spoilage bird seed for sprouting. White millet in particular sprouts quickly and uniformly. The grass-seed fraction in many bird seed mixes also sprouts readily and gives you a wheatgrass-like green that chickens love.
How to sprout bird seed safely
What you need
- Wide, shallow plastic or stainless-steel tray with drainage holes (or a sprouting jar with a mesh lid)
- Second tray or rack to act as a drip catcher
- Clean tap water (filtered if your tap has high chloramine levels)
- A dilute bleach solution for sanitizing: roughly 1 tablespoon of unscented household bleach per gallon of water
- Untreated bird seed or whole grain
Step-by-step process
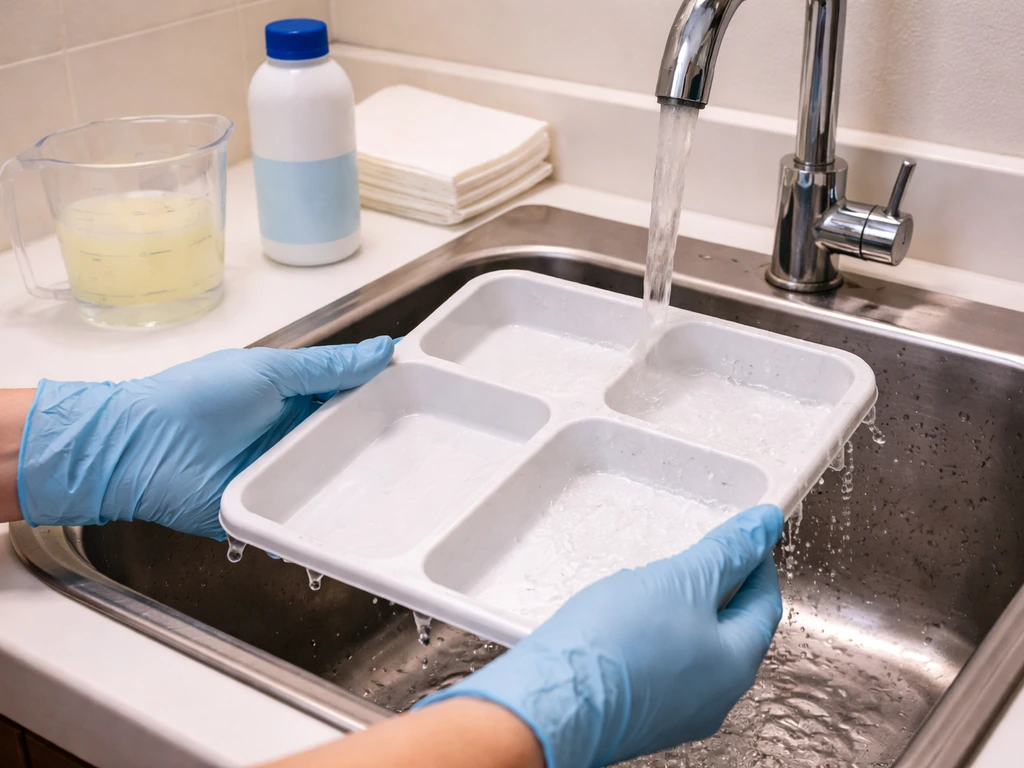
- Sanitize your tray before you start. Soak it in dilute bleach solution for at least two minutes, then rinse thoroughly and let it air-dry. Do this every time you start a new batch.
- Measure your seed. Start small: about half a cup of dry seed per sprouting tray. Seed expands significantly during soaking and sprouting.
- Soak the seed. Place seed in a clean jar or bowl, cover with cool water, and soak for 8 to 12 hours (overnight works well). Use a ratio of roughly three parts water to one part seed so there is plenty of room.
- Drain and rinse thoroughly. After soaking, drain off all water completely. Rinse the seed under running water for 30 to 60 seconds, then spread it in your sanitized tray in a layer no more than 1 to 1.5 inches deep. Standing water is the fastest route to bacterial growth and mold.
- Rinse every 12 hours without exception. Tip the tray to drain or run fresh water through twice a day, morning and evening. This step is non-negotiable for food safety. Each rinse flushes away the bacterial load that builds up in warm, moist conditions.
- Keep the tray somewhere with good airflow and moderate temperature. A shaded porch, a countertop away from direct sun, or an indoor shelf at 65 to 75 degrees Fahrenheit works well. Heat speeds up both sprouting and bacterial growth, so avoid hot spots.
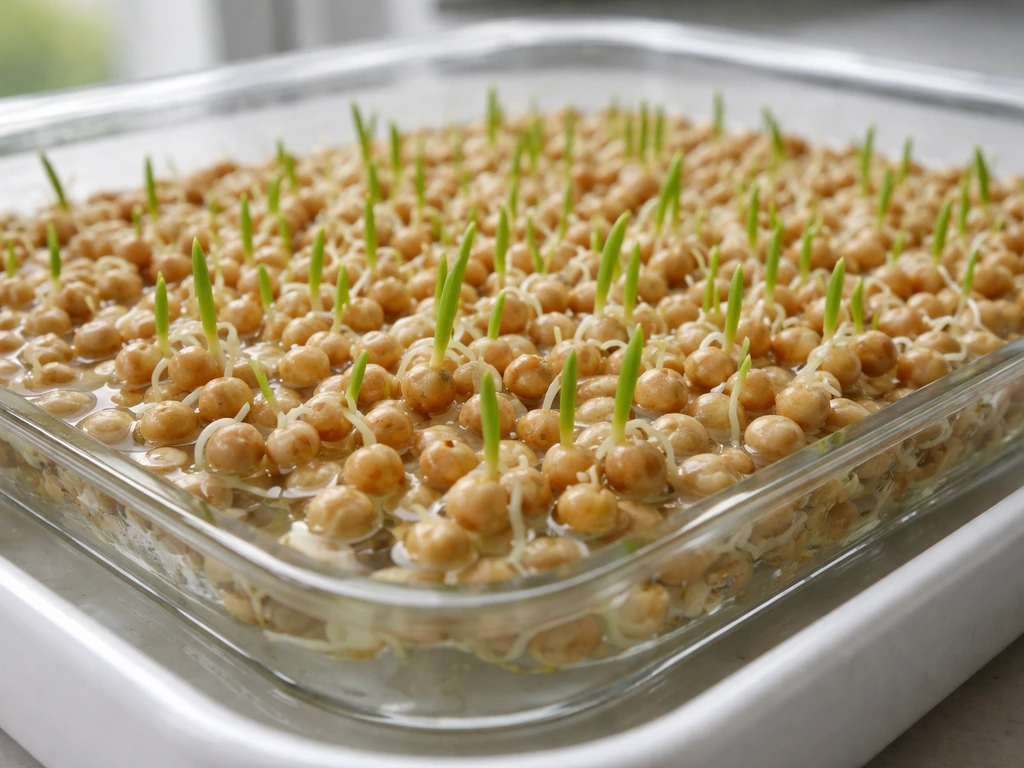
- Allow sprouts to grow for 2 to 7 days depending on what you want. By day 2 to 3 you get a short white tail (the radicle) which is the most nutrient-dense stage. By day 5 to 7 in a tray you get green shoots, similar to what a fodder system produces.
How to know sprouts are ready and how much to feed
Sprouts are ready to feed when the white root tail is 1/4 to 1/2 inch long, usually 2 to 3 days after soaking. At this stage the seeds are germinated, digestibility is improved, and the sprout is firm and smells clean and slightly grassy. If you are running a full tray fodder system and want green shoots, wait 5 to 7 days until the greens are an inch or two tall and the root mat has consolidated the tray.
Feed sprouts as a supplement, not a complete diet replacement. Poultry nutritionists consistently position whole and sprouted grains in the same category as scratch: a treat or dietary addition that should make up no more than about 10% of total daily feed intake. Replacing complete layer feed with sprouts will undermine egg production, shell quality, and overall flock health. A practical guideline is about 1 to 2 tablespoons of sprouts per bird per day, scattered in the run or placed in a shallow dish. Introduce sprouts gradually over three to five days if your birds have never had them, since any new food can temporarily disrupt digestion.
One thing to watch: avoid sprouting finely ground or cracked wheat in large quantities for chickens. Fine wet wheat turns gummy and pasty and can stick to beaks and cause digestive problems. Stick to whole seeds and whole grains.
Mold, smell, and bacterial risk: safety checks and when to discard
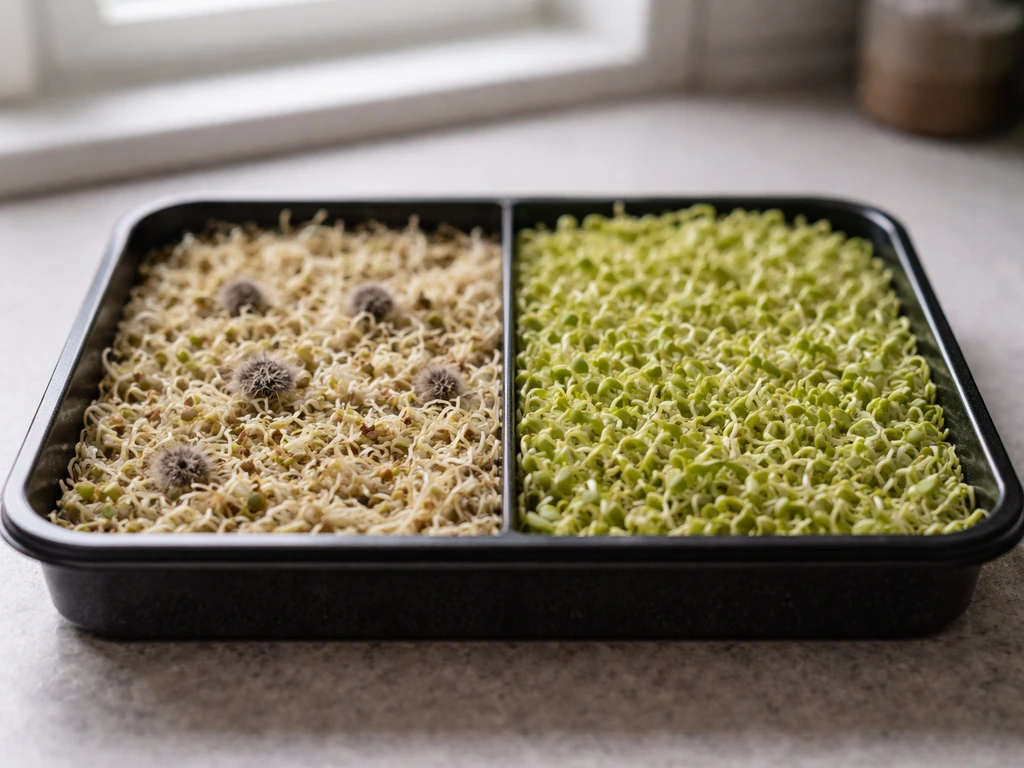
The warm, moist environment inside a sprouting tray is genuinely good at growing bacteria. Overnight soaking of seeds in tap water can increase aerobic plate counts, which is why sanitation and water quality during soaking matter aerobic plate counts increase. Dry seed can carry pathogens that, under sprouting conditions, multiply rapidly. This is not a reason to avoid sprouting, but it is a reason to take the twice-daily rinse seriously and to keep your equipment clean. Before you feed a batch, do a quick check every time.
Discard the entire batch immediately if you notice any of the following:
- Any fuzzy growth, whether white, gray, green, or black. Mold spreads through a wet tray fast, and you cannot safely eat around it.
- A sour, fermented, or ammonia-like smell. Fresh sprouts smell clean and mildly grassy. An off-odor means bacterial overgrowth or the early stages of mold.
- Slimy texture on the seeds or root mass. Healthy sprout roots are firm. Sliminess means bacterial spoilage.
- Any pink or orange discoloration on the seed mass.
If you are unsure, throw it out. A failed batch of sprouts costs pennies. The risk of feeding moldy or bacterially contaminated material to your flock is not worth it. Sanitize the tray before starting over.
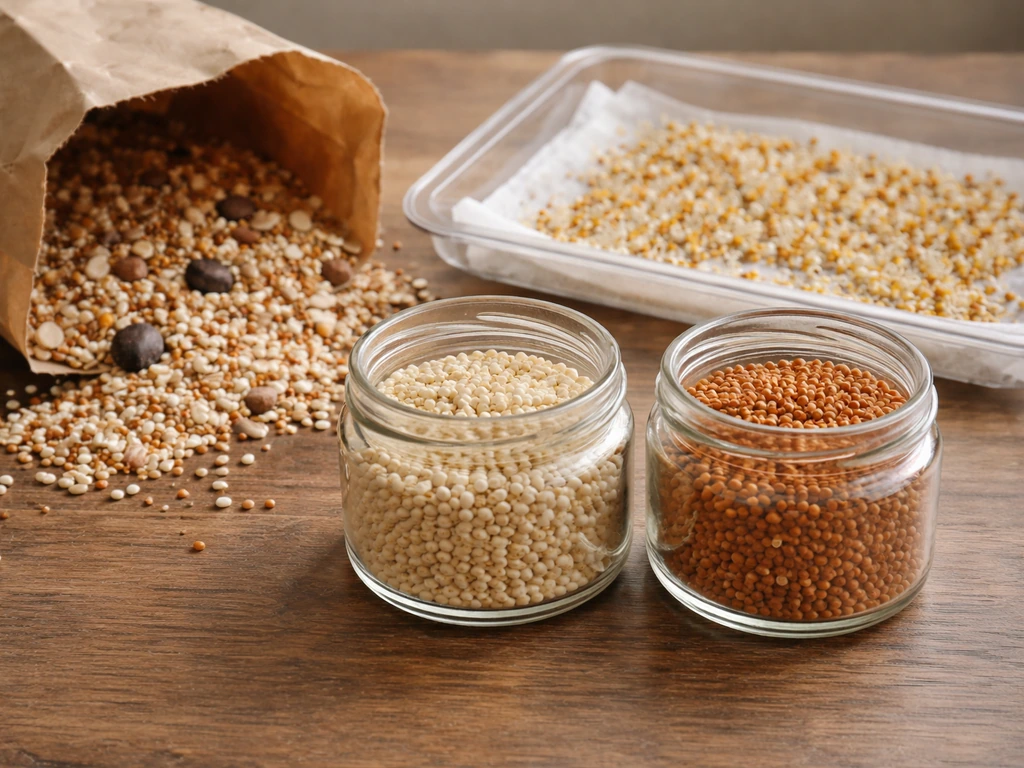
How to store dry seed vs sprouted seed
Dry bird seed and sprouted seed have almost nothing in common when it comes to storage. Once you add water, the clock starts ticking fast.
| Aspect | Dry Bird Seed | Sprouted Seed |
|---|---|---|
| Shelf life | 6 to 12 months in cool, dry storage | 2 to 3 days maximum after sprouting |
| Moisture target | Below 12% moisture; above this, mold risk rises sharply | Moist by definition; must be used quickly |
| Storage container | Sealed airtight container (metal bin or food-grade bucket) | Open tray with drainage; never sealed airtight |
| Temperature | Cool and dry, away from heat sources | 65 to 75°F during sprouting; refrigerate briefly if needed |
| Refrigeration | Not needed or helpful | Can slow sprouting by 1 to 2 days; do not store sprouts in fridge for more than 24 hours before feeding |
| Pest risk | Moderate (insects, rodents attracted to seed) | Low storage risk but feeding area attracts rodents if not cleaned up |
Store dry bird seed in a sealed metal or hard-sided plastic container with a tight lid, off the ground, in a cool shaded location. Moisture above 12% in stored grain promotes mold and chemical degradation regardless of whether the seed has sprouted. OSU notes that wheat with moisture content above 12.5% is at higher risk in storage regardless of test weight, sprouting, or quality moisture above 12.5% is at risk in storage. If your stored seed bags feel damp or you see any clumping or visible mold at the top of the bag, do not sprout it or feed it. For the sprouting process itself, never try to hold a batch of germinated seed for more than two to three days without rinsing daily. There is no way to extend sprouted seed's shelf life in a way that maintains food safety.
Cleanup and pest prevention around sprouting trays and feeding areas
Sprouting involves water, organic material, and warmth, which is also the recipe for attracting insects and rodents. A few consistent habits keep this from becoming a problem.
- Rinse trays over a drain or outside away from the coop, not over the soil right next to the feeding area. Rinsing near the coop creates a damp, seed-rich patch that draws insects.
- After each batch, scrub trays with hot water and dish soap, then sanitize with dilute bleach solution and let dry completely before the next use. Root mats left in trays will mold within hours.
- Feed sprouts in a shallow dish or spread them directly on a hard clean surface, not on bare soil where uneaten sprouts will decompose and attract pests.
- Remove any uneaten sprouts within one to two hours. Chickens pick through fresh sprouts quickly; anything left sitting in warm sun in the run will start to mold the same day.
- Store dry seed in rodent-proof sealed metal containers. Plastic bins are chewable; metal trash cans with snap lids or purpose-built feed bins work best.
- In warm, humid climates (the Southeast US, Gulf Coast, and coastal regions), plan for faster mold development in your tray and potentially shorter successful sprouting windows. Rinse more frequently, keep trays indoors in air conditioning, and batch smaller amounts more often.
Troubleshooting failed sprouting and common chicken-feeding issues
Most problems with sprouting bird seed for chickens fall into a handful of repeating categories. Here is what causes them and how to fix them:
| Problem | Likely Cause | Fix | Prevention |
|---|---|---|---|
| Seeds not germinating after 3 days | Old seed with low viability, or treated/coated seed | Start fresh with a new batch of untreated seed from a different source | Buy seed labeled untreated or food-grade; do a germination test (10 seeds on a damp paper towel) before committing to a large batch |
| Mold appears by day 2 | Not rinsing often enough, too-deep seed layer, or poor airflow | Discard batch, sanitize tray, restart with thinner layer and strict 12-hour rinse schedule | Rinse every 12 hours without fail; keep seed layer under 1.5 inches; ensure airflow around tray |
| Sour or fermented smell | Bacterial overgrowth, often from standing water or skipped rinses | Discard the batch; do not feed it | Drain completely after every rinse; eliminate any pooling water in the tray |
| Chickens refuse to eat sprouts | Unfamiliar food; introduced too fast | Mix a small amount of sprouts into regular feed to introduce gradually over 5 to 7 days | Always transition new foods slowly with poultry |
| Sprouts are slimy or mushy | Over-sprouted, bacterial spoilage, or too warm | Discard; shorten sprouting time on next batch | Feed at 2 to 3 day stage rather than waiting for full greens; keep tray below 75°F |
| Insects appearing in or around trays | Rinsing near soil, leaving uneaten sprouts in run | Clean up immediately; move rinsing to a drain | Feed only what chickens will eat in one sitting; clean trays same day |
| Egg production dropping | Sprouts replacing too much complete layer feed | Reduce sprout quantity; keep it to 10% or less of daily diet | Treat sprouts as a treat or supplement, never a meal replacement |
One myth worth addressing directly: some backyard chicken forums claim that sprouting dramatically multiplies the nutritional content of seed and can replace commercial feed. The research does not support that. Sprouting does improve digestibility and bioavailability of some nutrients, but it does not transform grain into a complete poultry diet. Your chickens still need a balanced layer feed with the right calcium, protein, and vitamin levels that sprouts simply cannot provide on their own.
If you are interested in what specific seeds in a bird seed mix actually sprout (and how they behave), it is worth learning more about what millet and milo are individually, since those are the backbone of most sproutable blends and behave quite differently in terms of germination speed and moisture requirements. For example, what is white millet bird seed and how it sprouts can help you choose a safe, reliable blend for your tray. The seed you start with matters as much as the process you follow.
FAQ
What water temperature should I use when rinsing sprouting bird seed for chickens?
Use clean, cool-to-lukewarm water for rinsing and aim to rinse thoroughly and on schedule, twice daily for typical trays. Hot water can damage tender sprouts and reduce microbial control, while lukewarm or cool water helps keep the tray wet but not scalding, which also makes it easier to maintain consistent conditions.
Can I sprout any bird seed mix, including cracked or ground wheat?
No, do not. Only sprout whole, intact seeds and grains you would normally feed as scratch. Finely ground seed, heavily cracked wheat, and dusty mixes tend to form a pasty, sticky mass that can cling to beaks and gum up digestion, even if they initially look okay.
What should I do if I will be away and cannot rinse the tray twice a day?
Avoid it, unless you can confirm you can still rinse daily and keep the setup very clean. If you cannot reliably rinse (for example, during travel), it is safer to skip that batch, because warm wet trays are where spoilage accelerates quickly. If you must pause, move sprouts to a cooler area and do the first rinse immediately when you return.
Is it okay to sprout a mixed bird seed blend, or should I stick to one grain?
Mixing is usually fine, but start with a consistent seed source. If you use multi-ingredient blends, some fractions may sprout faster and others slower, which can leave you with uneven maturity across the tray. For best results, choose a plain millet or milo blend or a straight grain bag and sprout that alone until you are confident in timing.
If part of my sprouting batch looks questionable, can I remove the bad portion and feed the rest?
Rinse and smell test still apply, but also check texture. Slimy sprouts, sour or rotten odor, or visible fuzzy growth are clear discard signs. Even if only a small area looks off, it is safest to discard the whole batch rather than trying to “salvage” the rest.
How do I introduce sprouted bird seed to chicks or a new flock without upsetting their digestion?
Chickens tolerate sprouts best when you control quantity. Start with a small amount, for example a few teaspoons per bird or a small handful per group, then increase over several days. If you see loose droppings or reduced appetite, scale back and slow the introduction rather than forcing more.
Can sprouted bird seed replace my chickens' regular layer feed?
Typically yes, but keep it in the supplemental range. A practical ceiling is about 10% of total daily intake as sprouts or sprouted grain. If you are feeding sprouts, make sure your regular layer feed stays available and unchanged so calcium, protein, and vitamin levels remain correct for egg production.
Does sprouting longer for greens (instead of short root tails) change the safety risks?
Use the same early maturity window, but be more cautious with longer schedules. If you extend growth to taller greens, you still need daily rinsing and tighter hygiene because the longer the tray stays warm and wet, the higher the spoilage risk. Feed promptly at the time they meet the maturity targets, and do not hold them.
How should I store dry seed versus finished sprouted seed to prevent mold?
Yes. Store dry seed in a sealed container in a cool, shaded place, and do not sprout seed that is damp, clumped, or shows any mold on the bag. For sprouted seed, the key rule is freshness, do not try to refrigerate for days as a way to extend shelf life, keep rinsing daily and feed within the short safe window.
How long can I leave sprouted bird seed sitting before feeding it?
Aim for one batch at a time and feed immediately after rinsing and draining. Sprouts dry out quickly, but that is different from safe storage. If you cannot feed right away, it is better to reduce the batch size than to let sprouts sit wet for long periods.
Do I need to clean feeding dishes differently when offering sprouted seed?
If you are feeding in a shallow dish, clean the dish between batches and avoid letting old sprouts accumulate. Remove leftovers after a short period so they do not become a breeding site for insects and bacteria. Also place the dish where you can monitor it easily.
My chickens are sorting sprouts and eating more than I planned, what can I do?
Yes, some birds will sort and overeat if sprouts are available constantly. Scatter the measured amount, use shallow dishes, and feed at set times. This helps you keep intake in the supplemental range and prevents the tray from staying warm and wet longer than needed.
Next Article
What Is White Millet Bird Seed and How to Use It Safely
What white millet bird seed is, which birds it attracts, and how to store, feed, and keep it pest free safely.